f.Woocommerce: Install only if you plan to have a reservation funnel. Details will be covered in the ‘Landing page setup with reservation’ lesson.
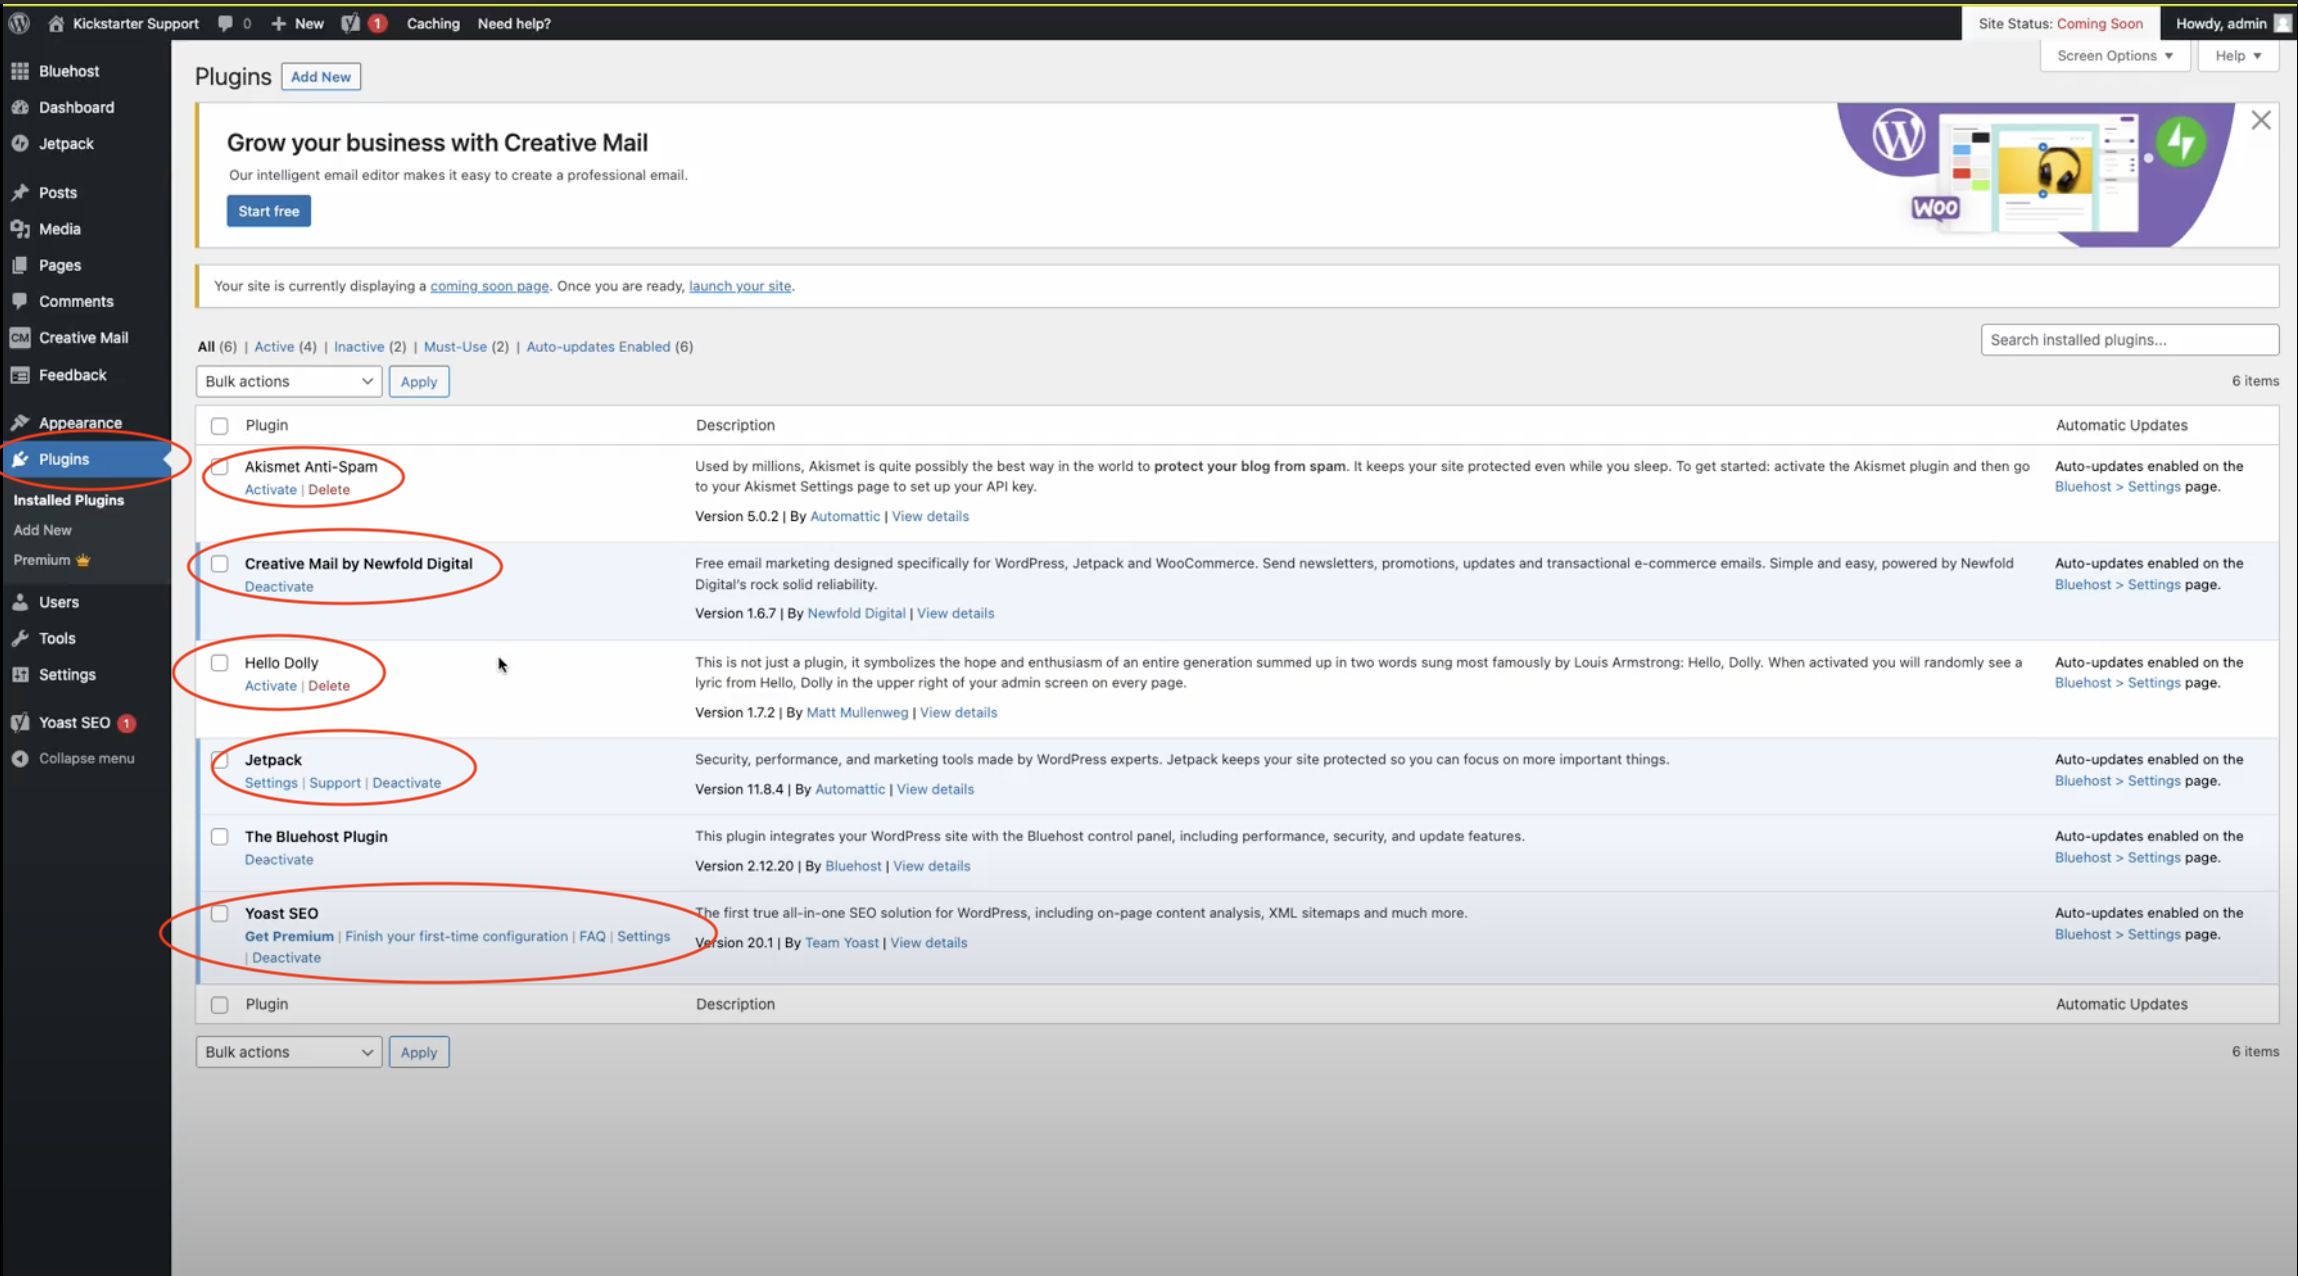
Once installed, activate all these plugins. Note: Some plugins will require further setup.
Setting Up Plugins:
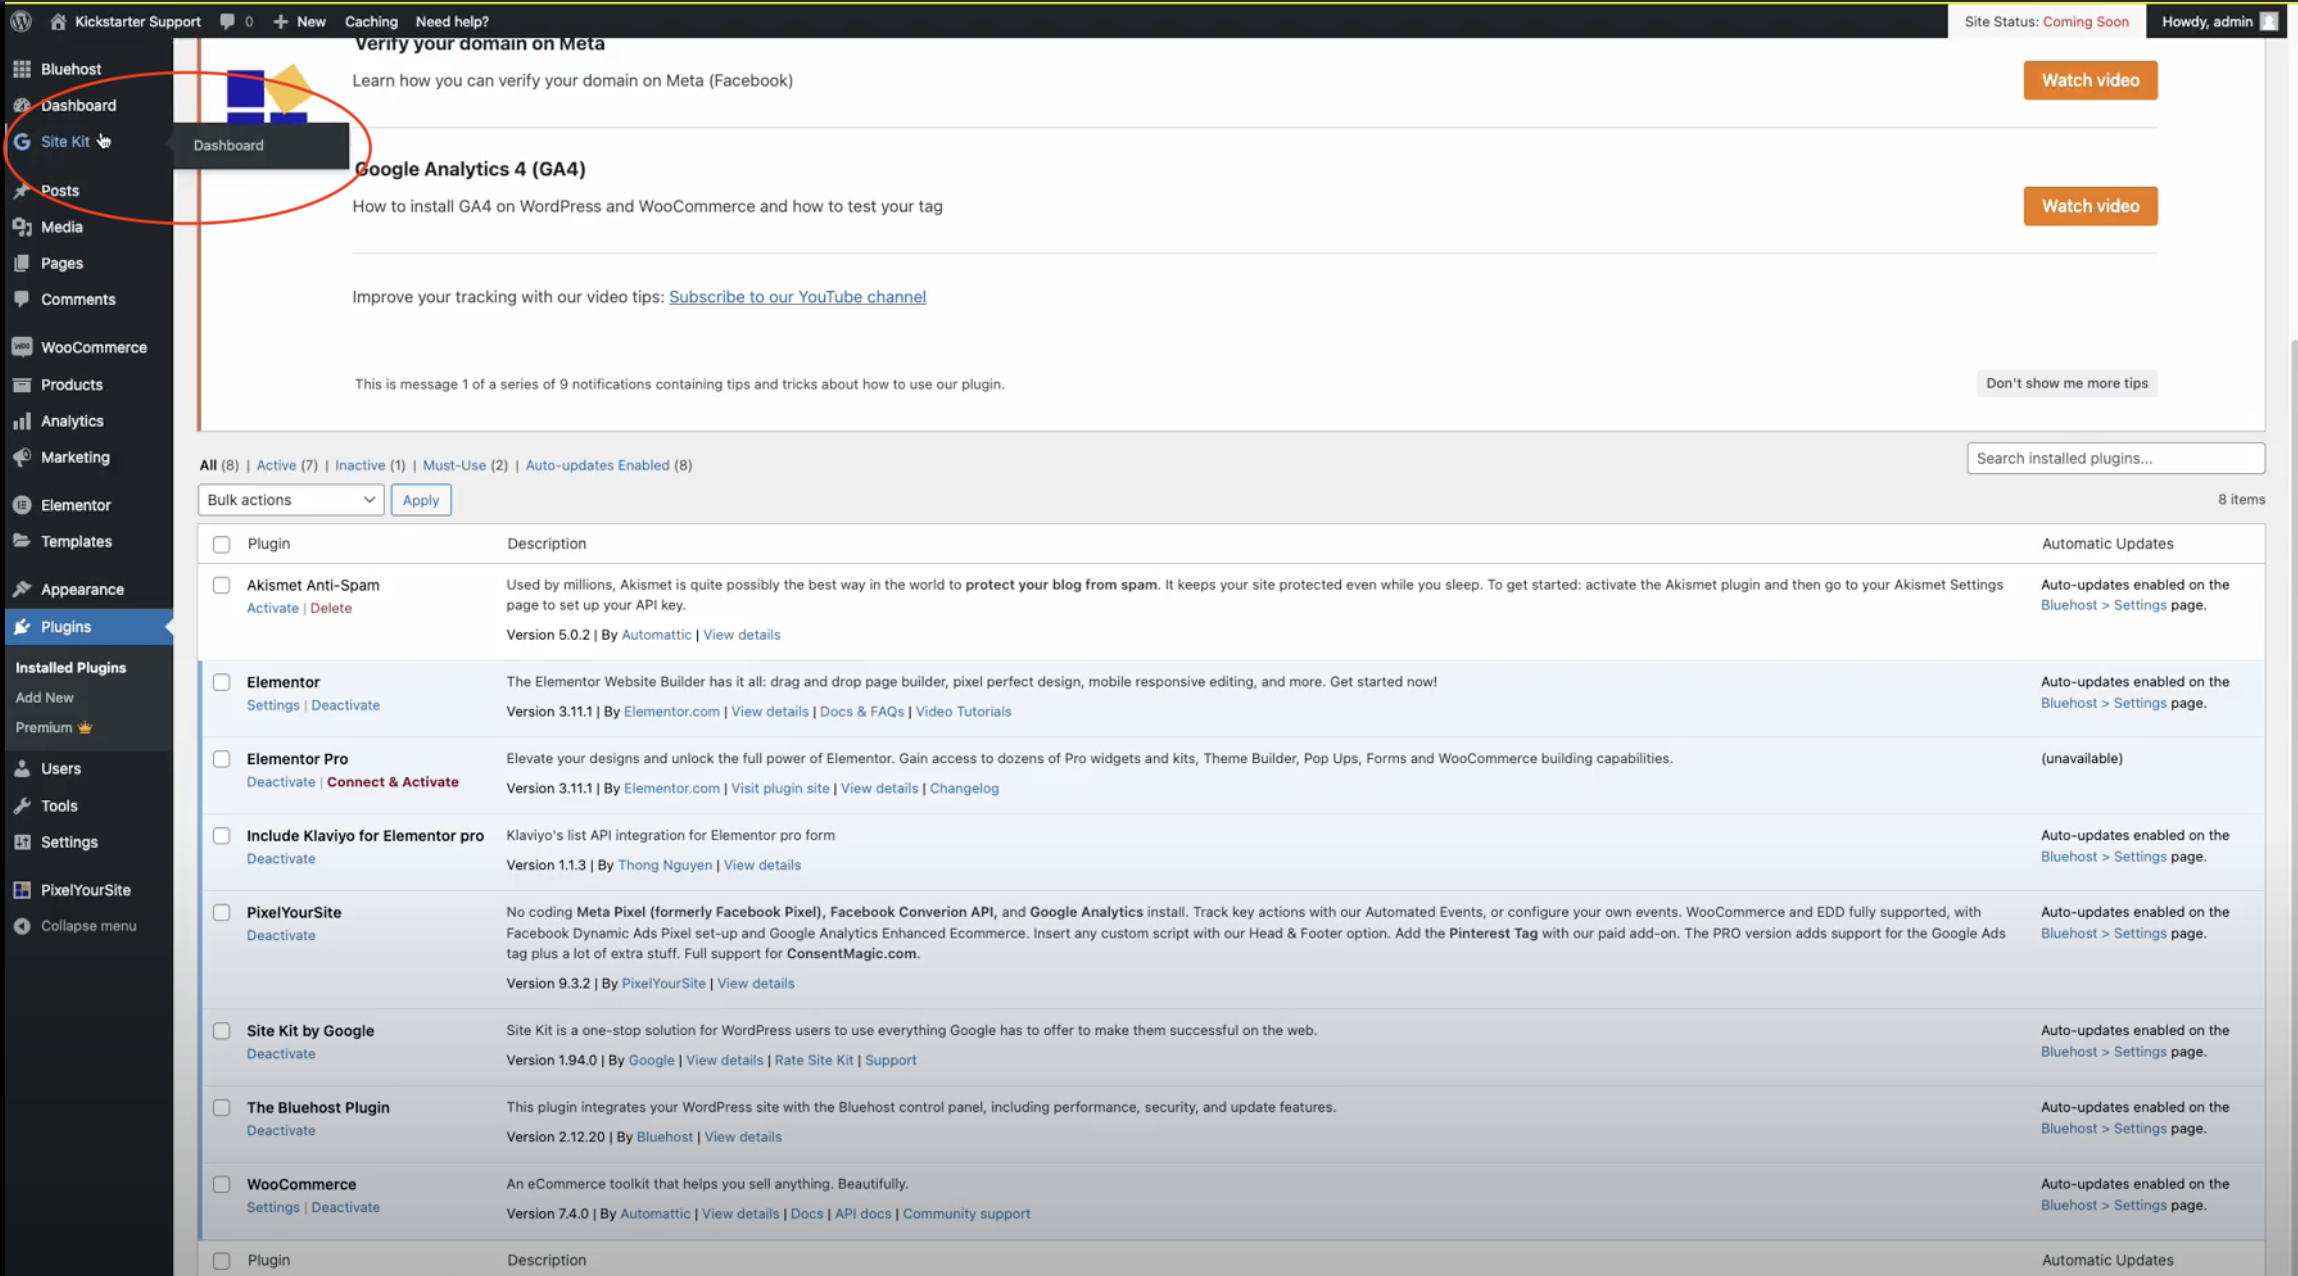
Site Kit by Google:
Click ‘Site Kit’ on the top left.
Connect Google Analytics.
Sign in with your Google account.
Follow the on-screen prompts to set up and connect your account.
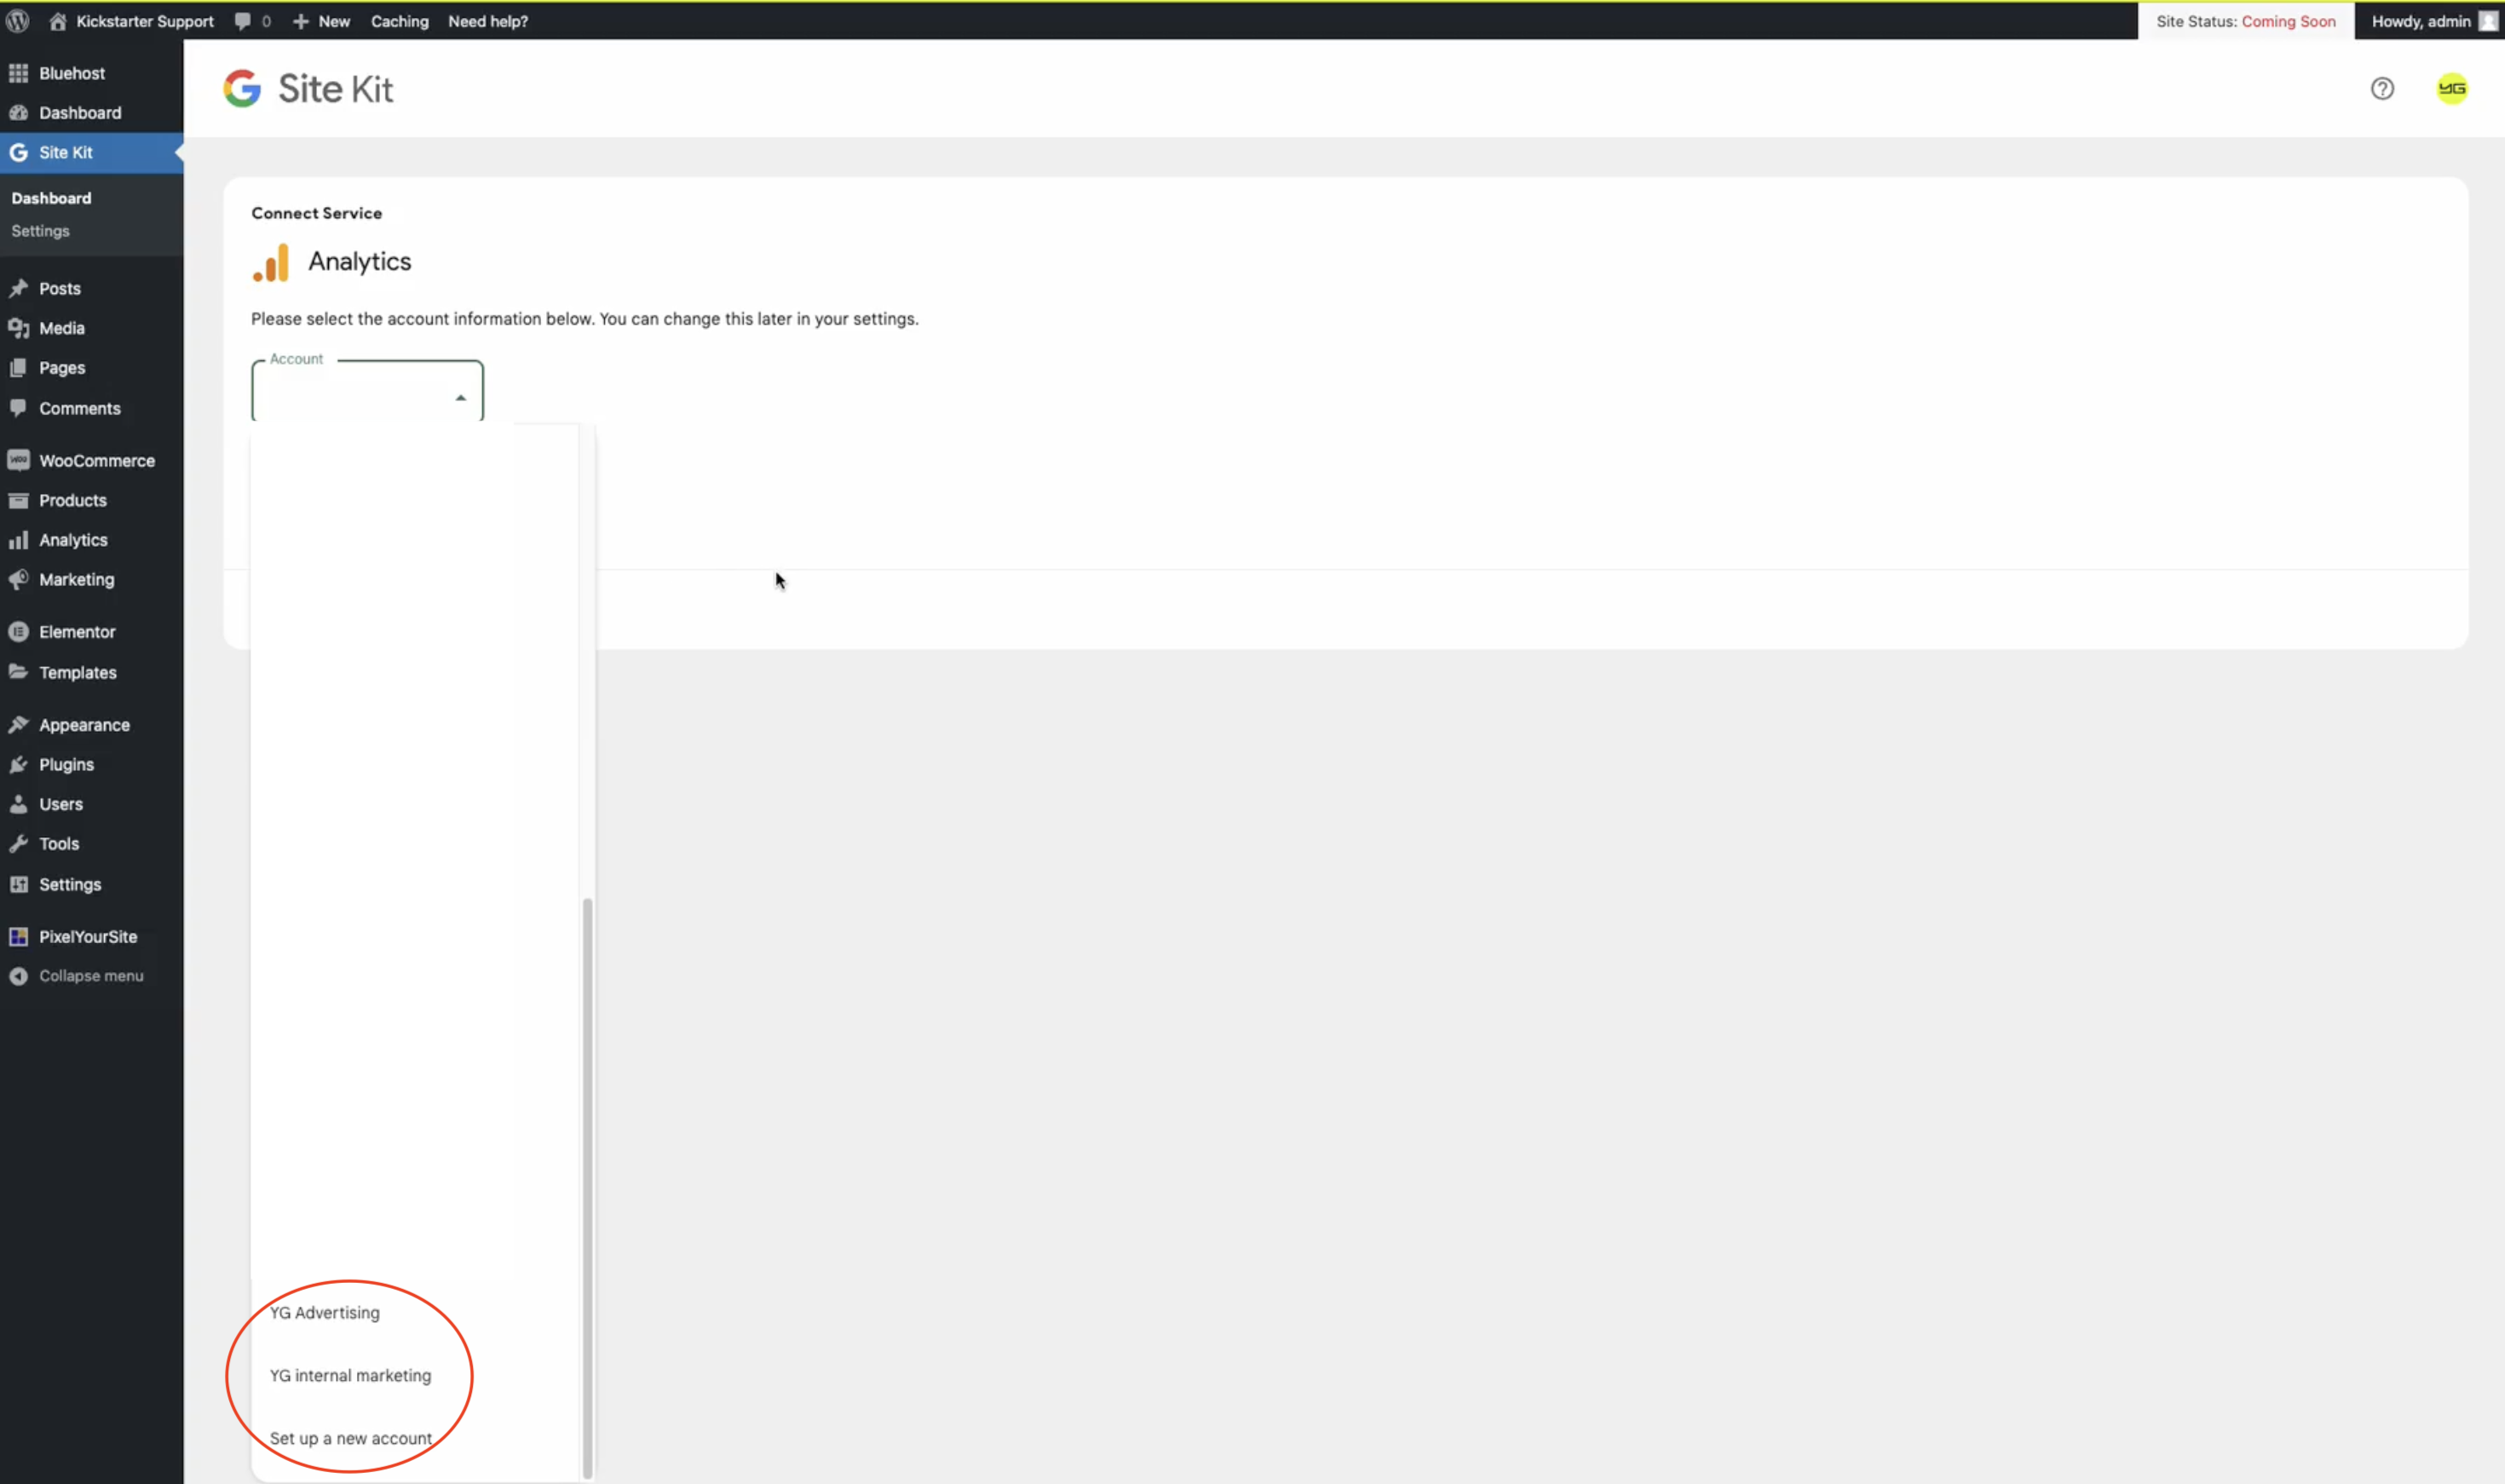
Go to your account
Under account, either select an existing account or select Set up a new account
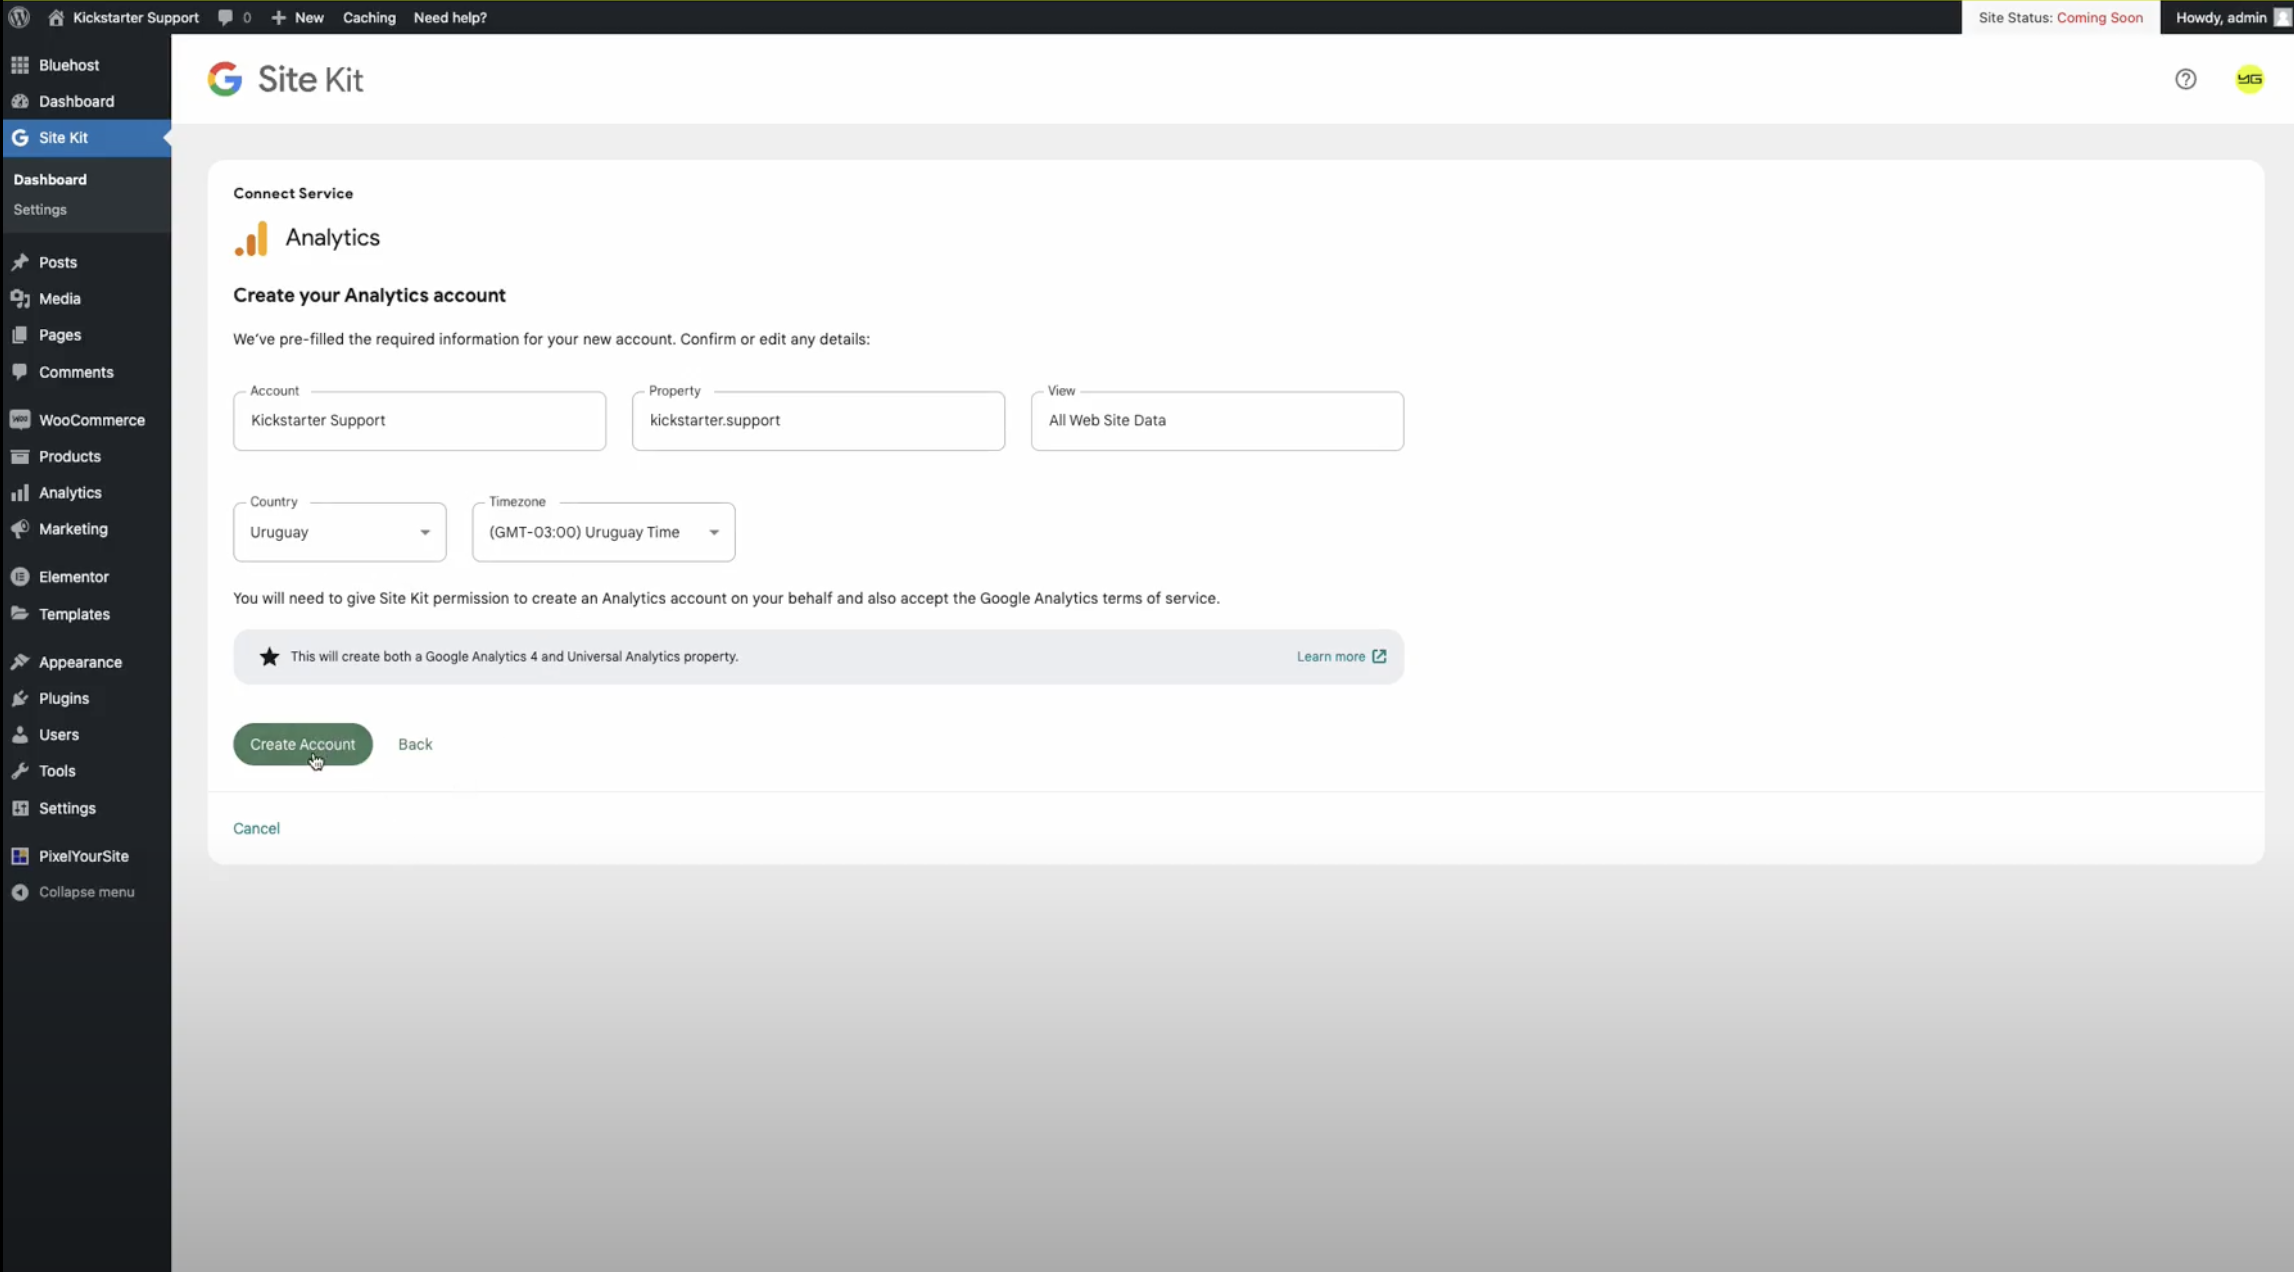
Fill out
Fill out the different fields. For Account name it Project_Name_Landing_Page, Property Landing Page, View All Website Data, Country your Country, Timezone Your timezone, once you are done click Create account.
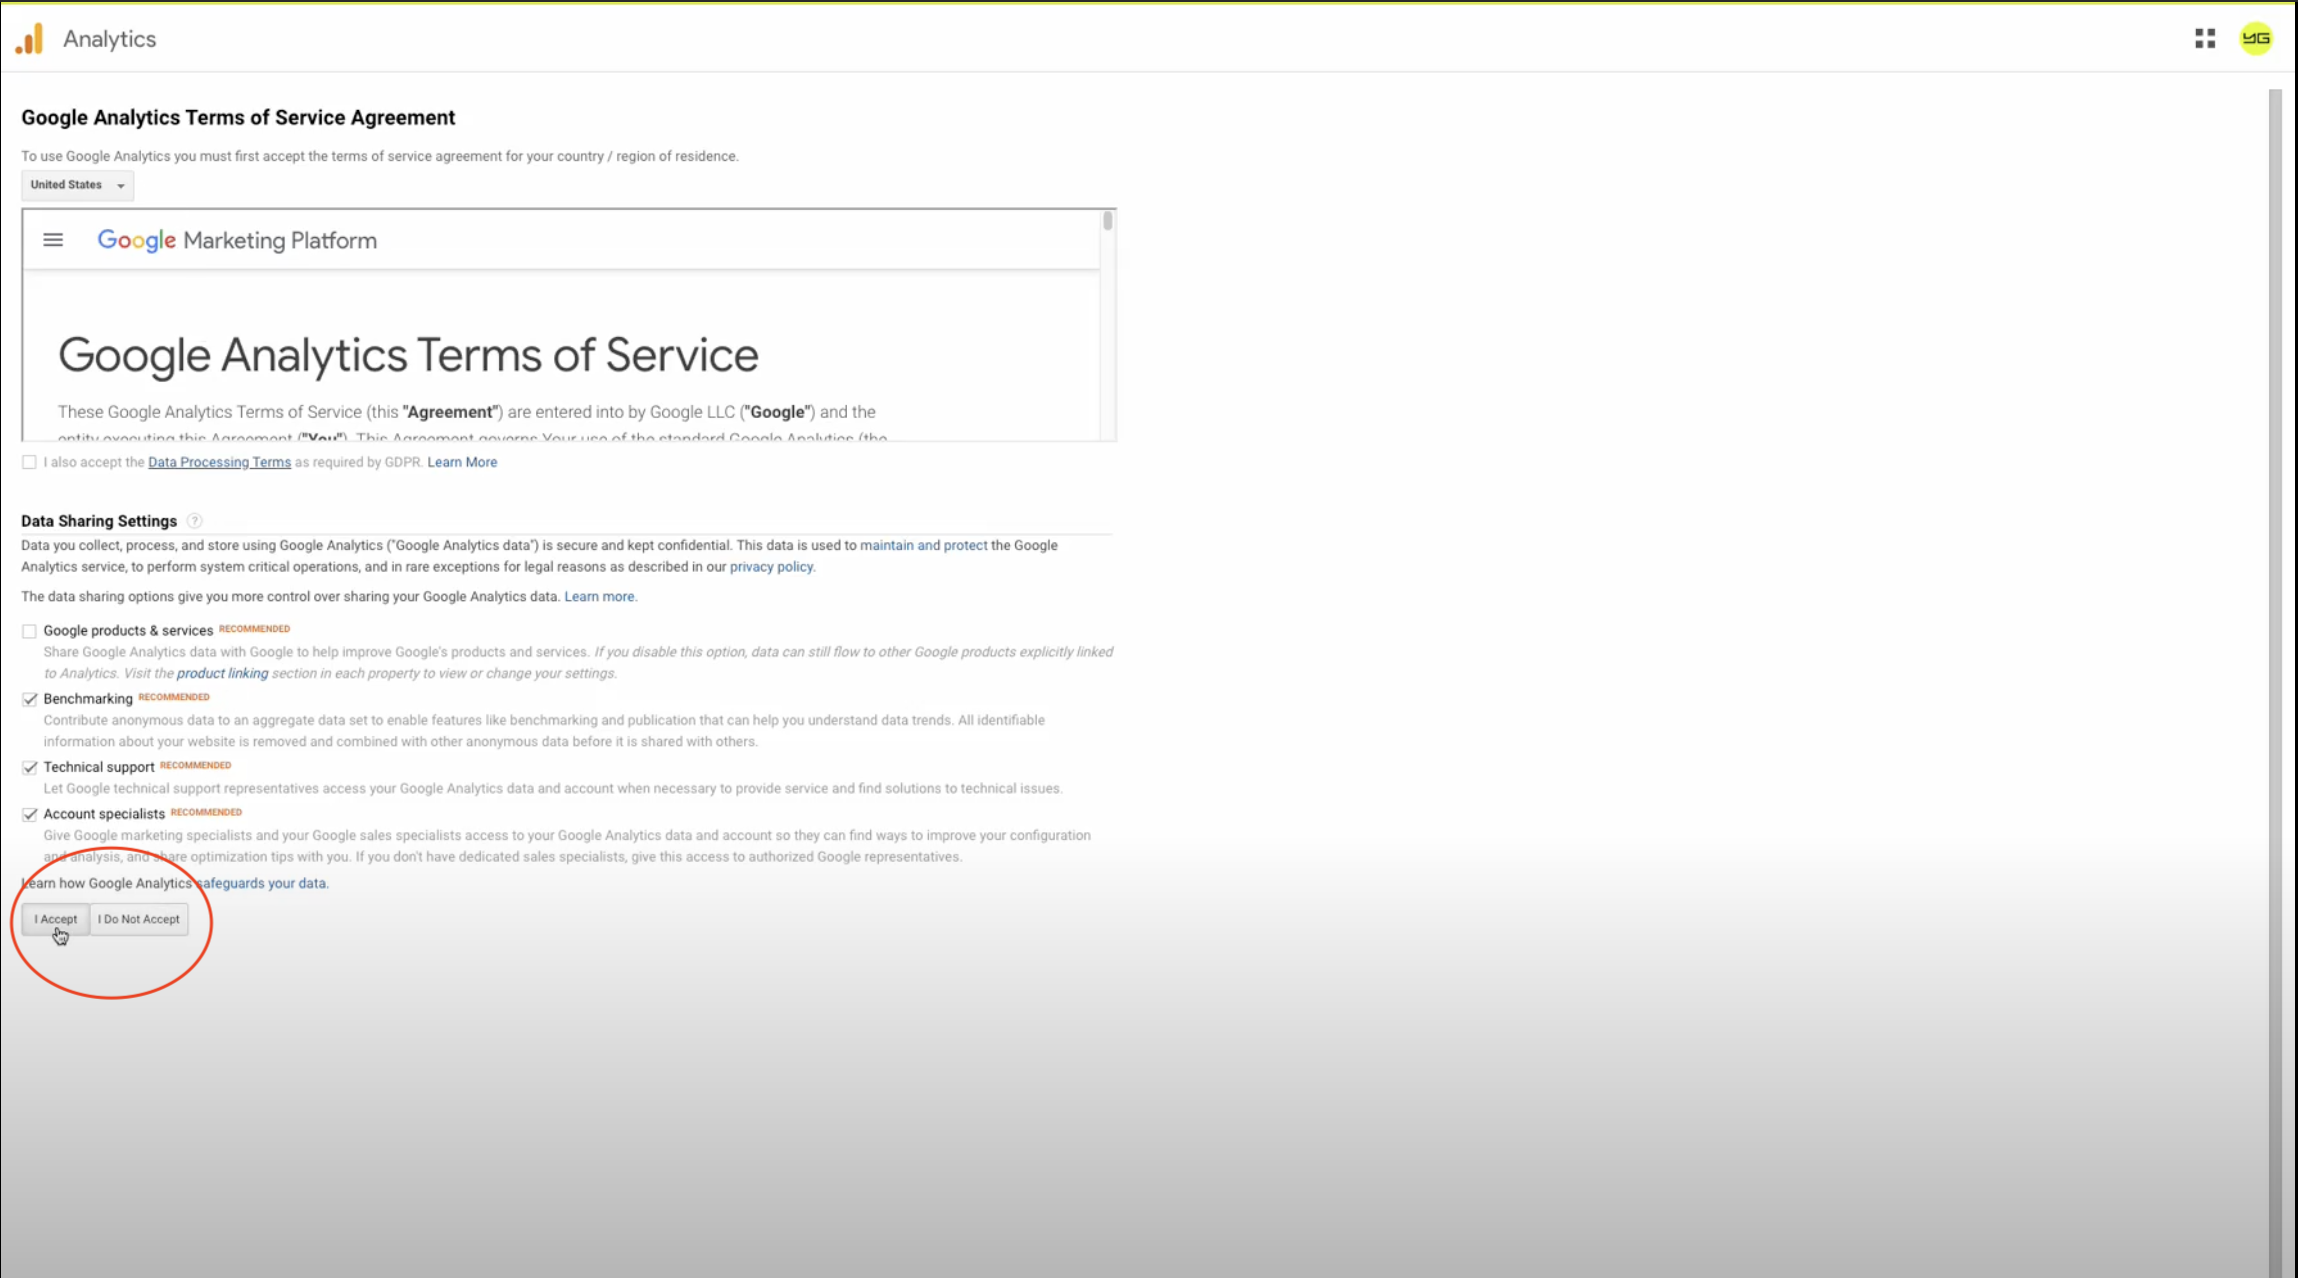
Accept terms & agreement
Select I accept under the Google Analytics Terms of Service Agreement.
Connection success
Now you have your landing page connected to your Google Analytics account, you won’t see any data, not even if the page is already live. It might take 24 hours to populate.
PixelYourSite and Meta Business Manager Integration
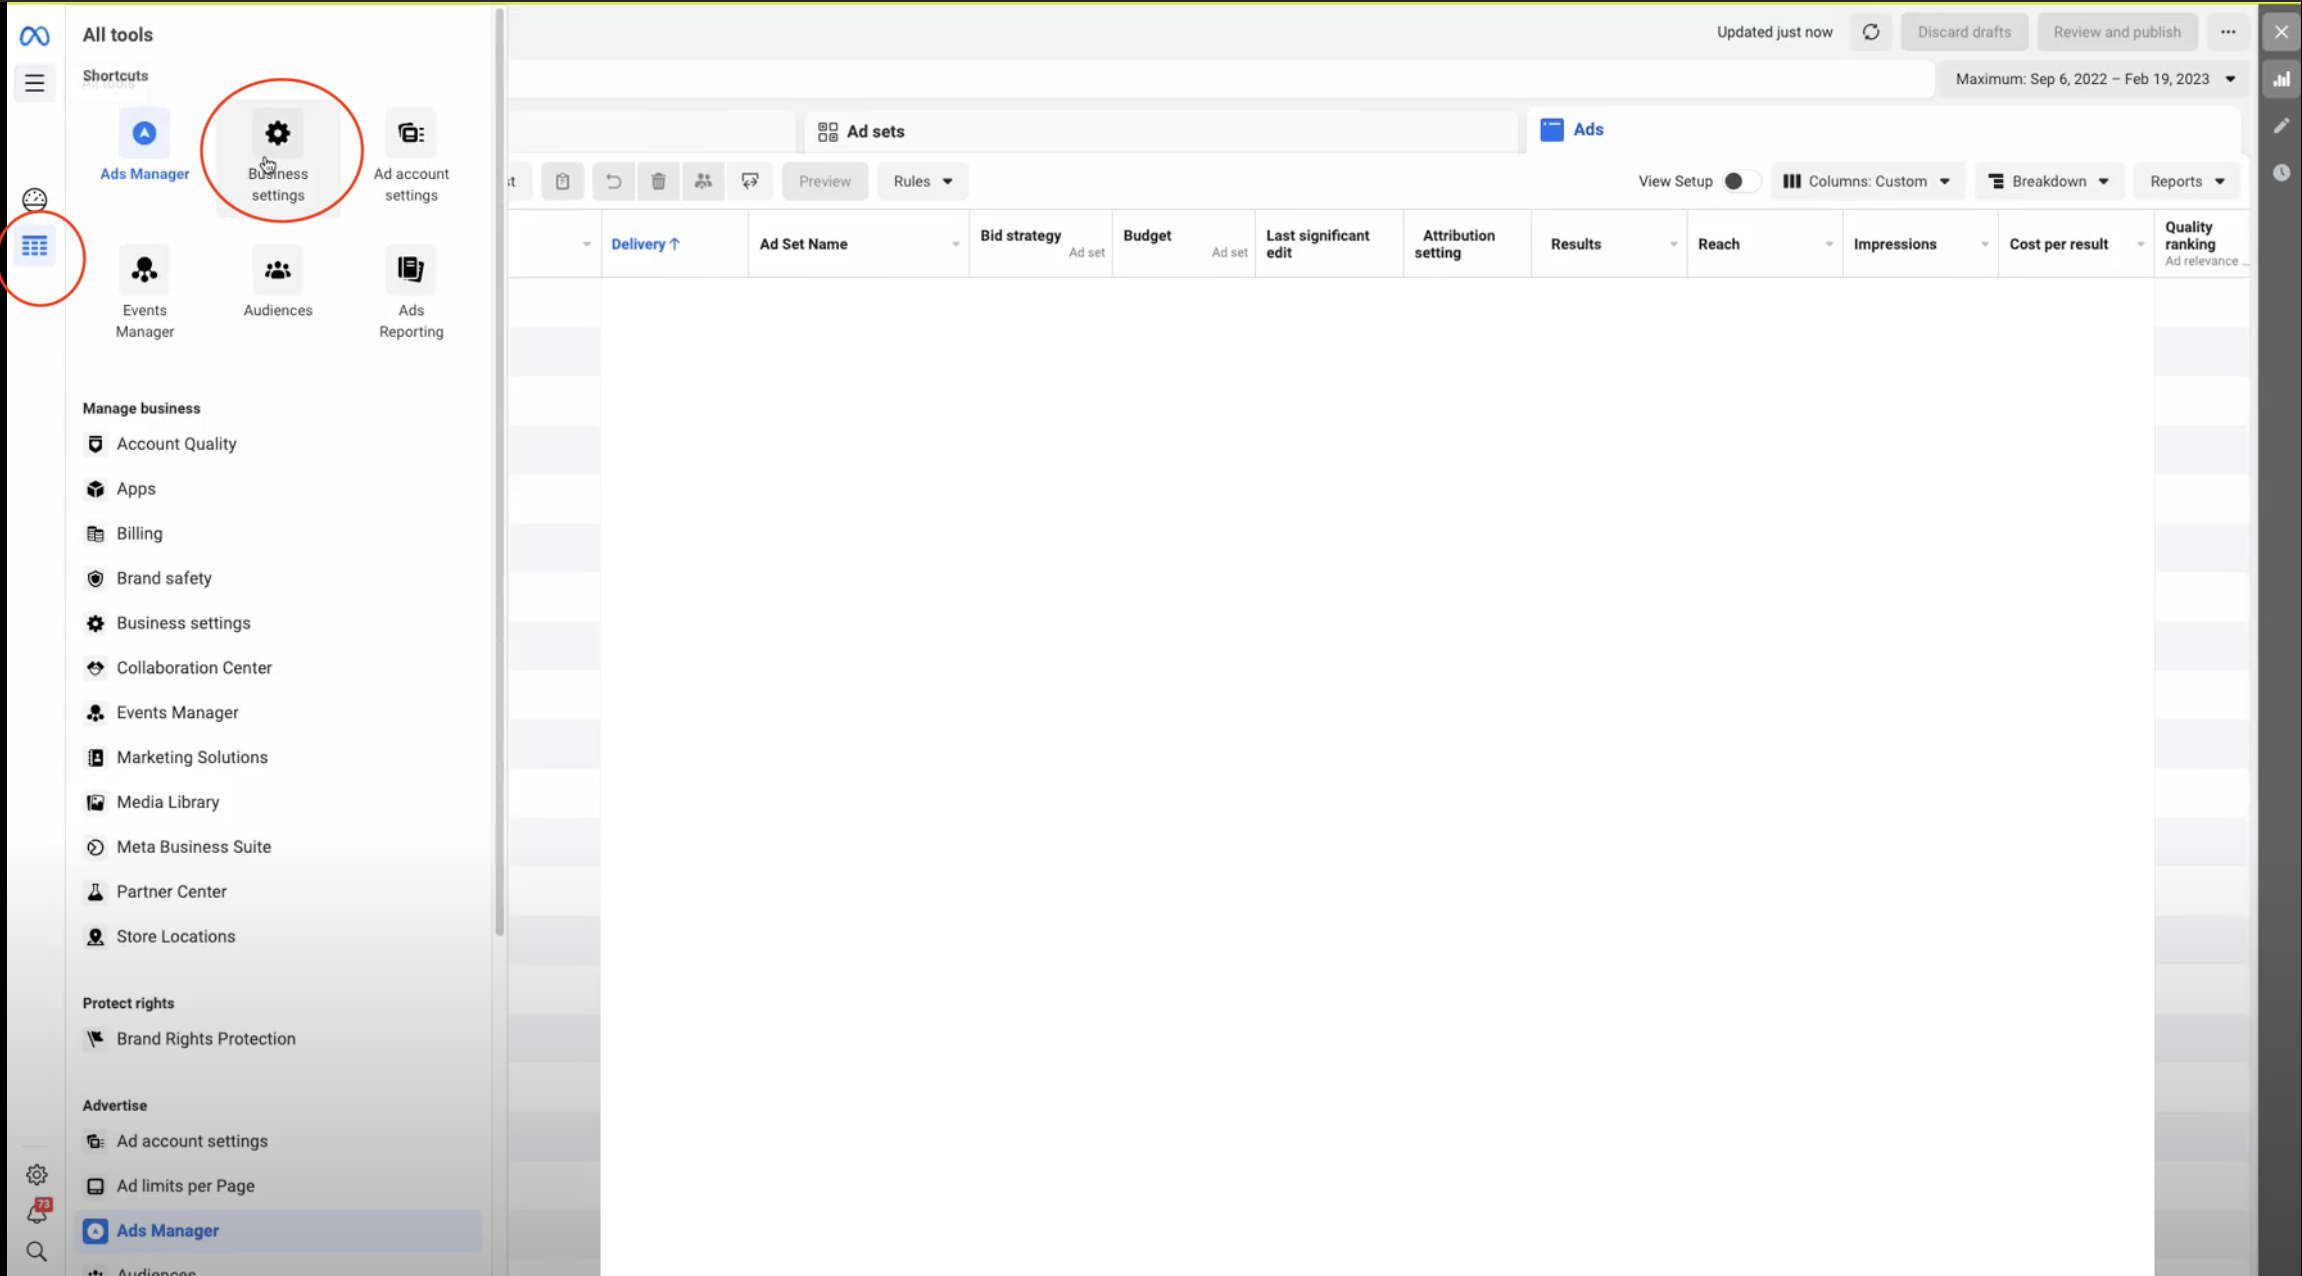
Click on PixelYourSite at the bottom left corner
Open your Meta Bussiness Manager on another tab and login
click on the burger menu and choose Business Setting.
Go to brand safety
Choose domains
Click on add
Create a new domain
Enter your domain
Example: Launchingsoon.co
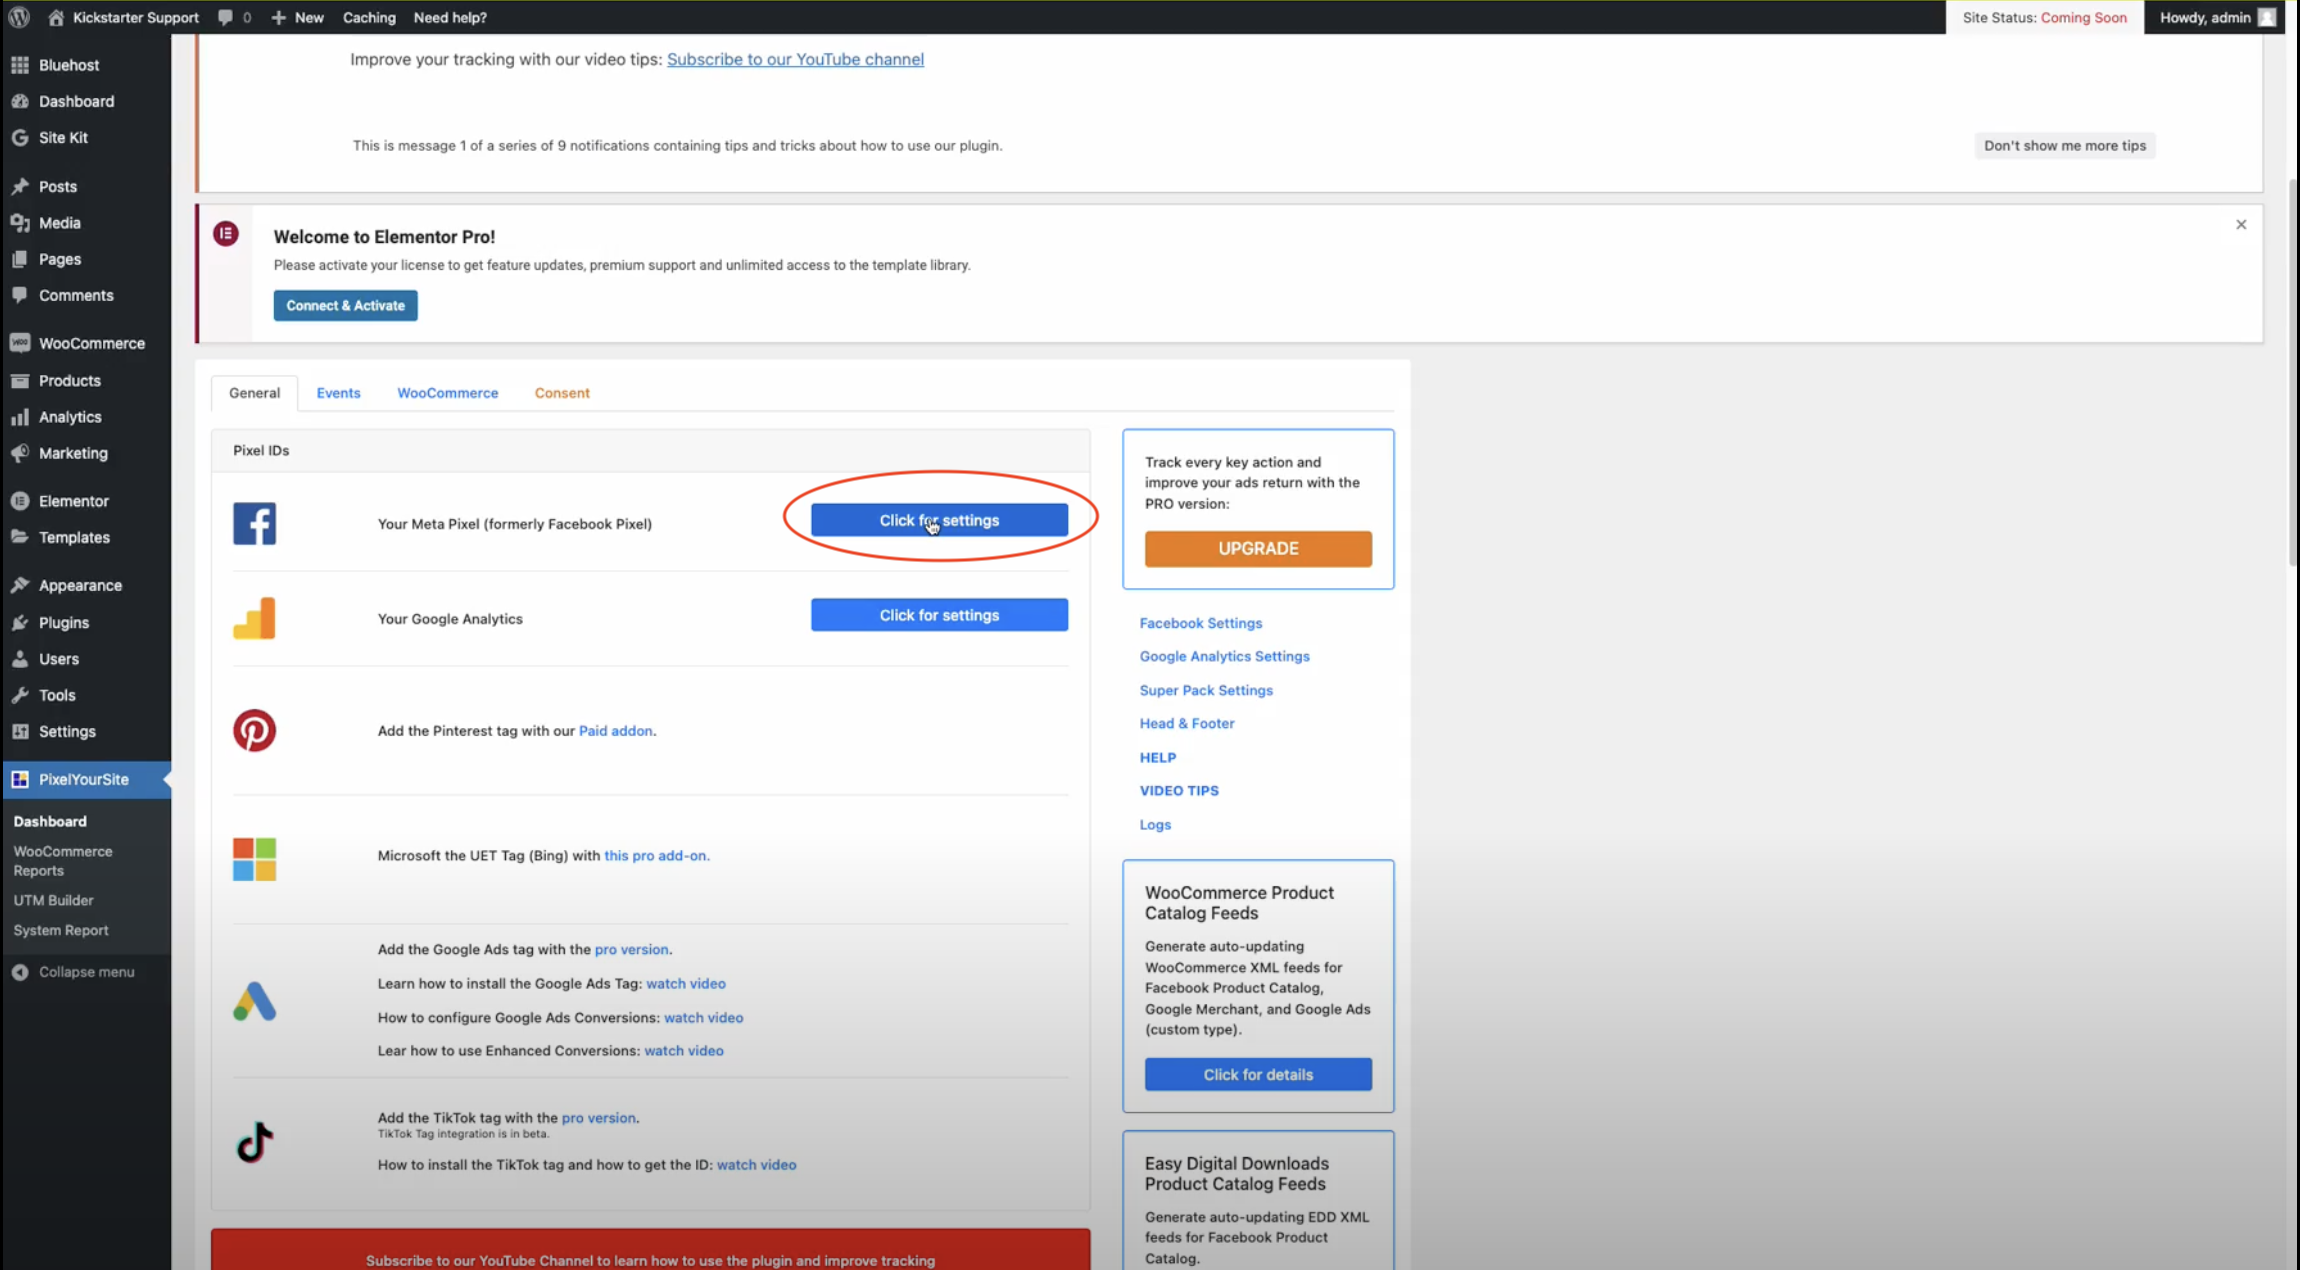
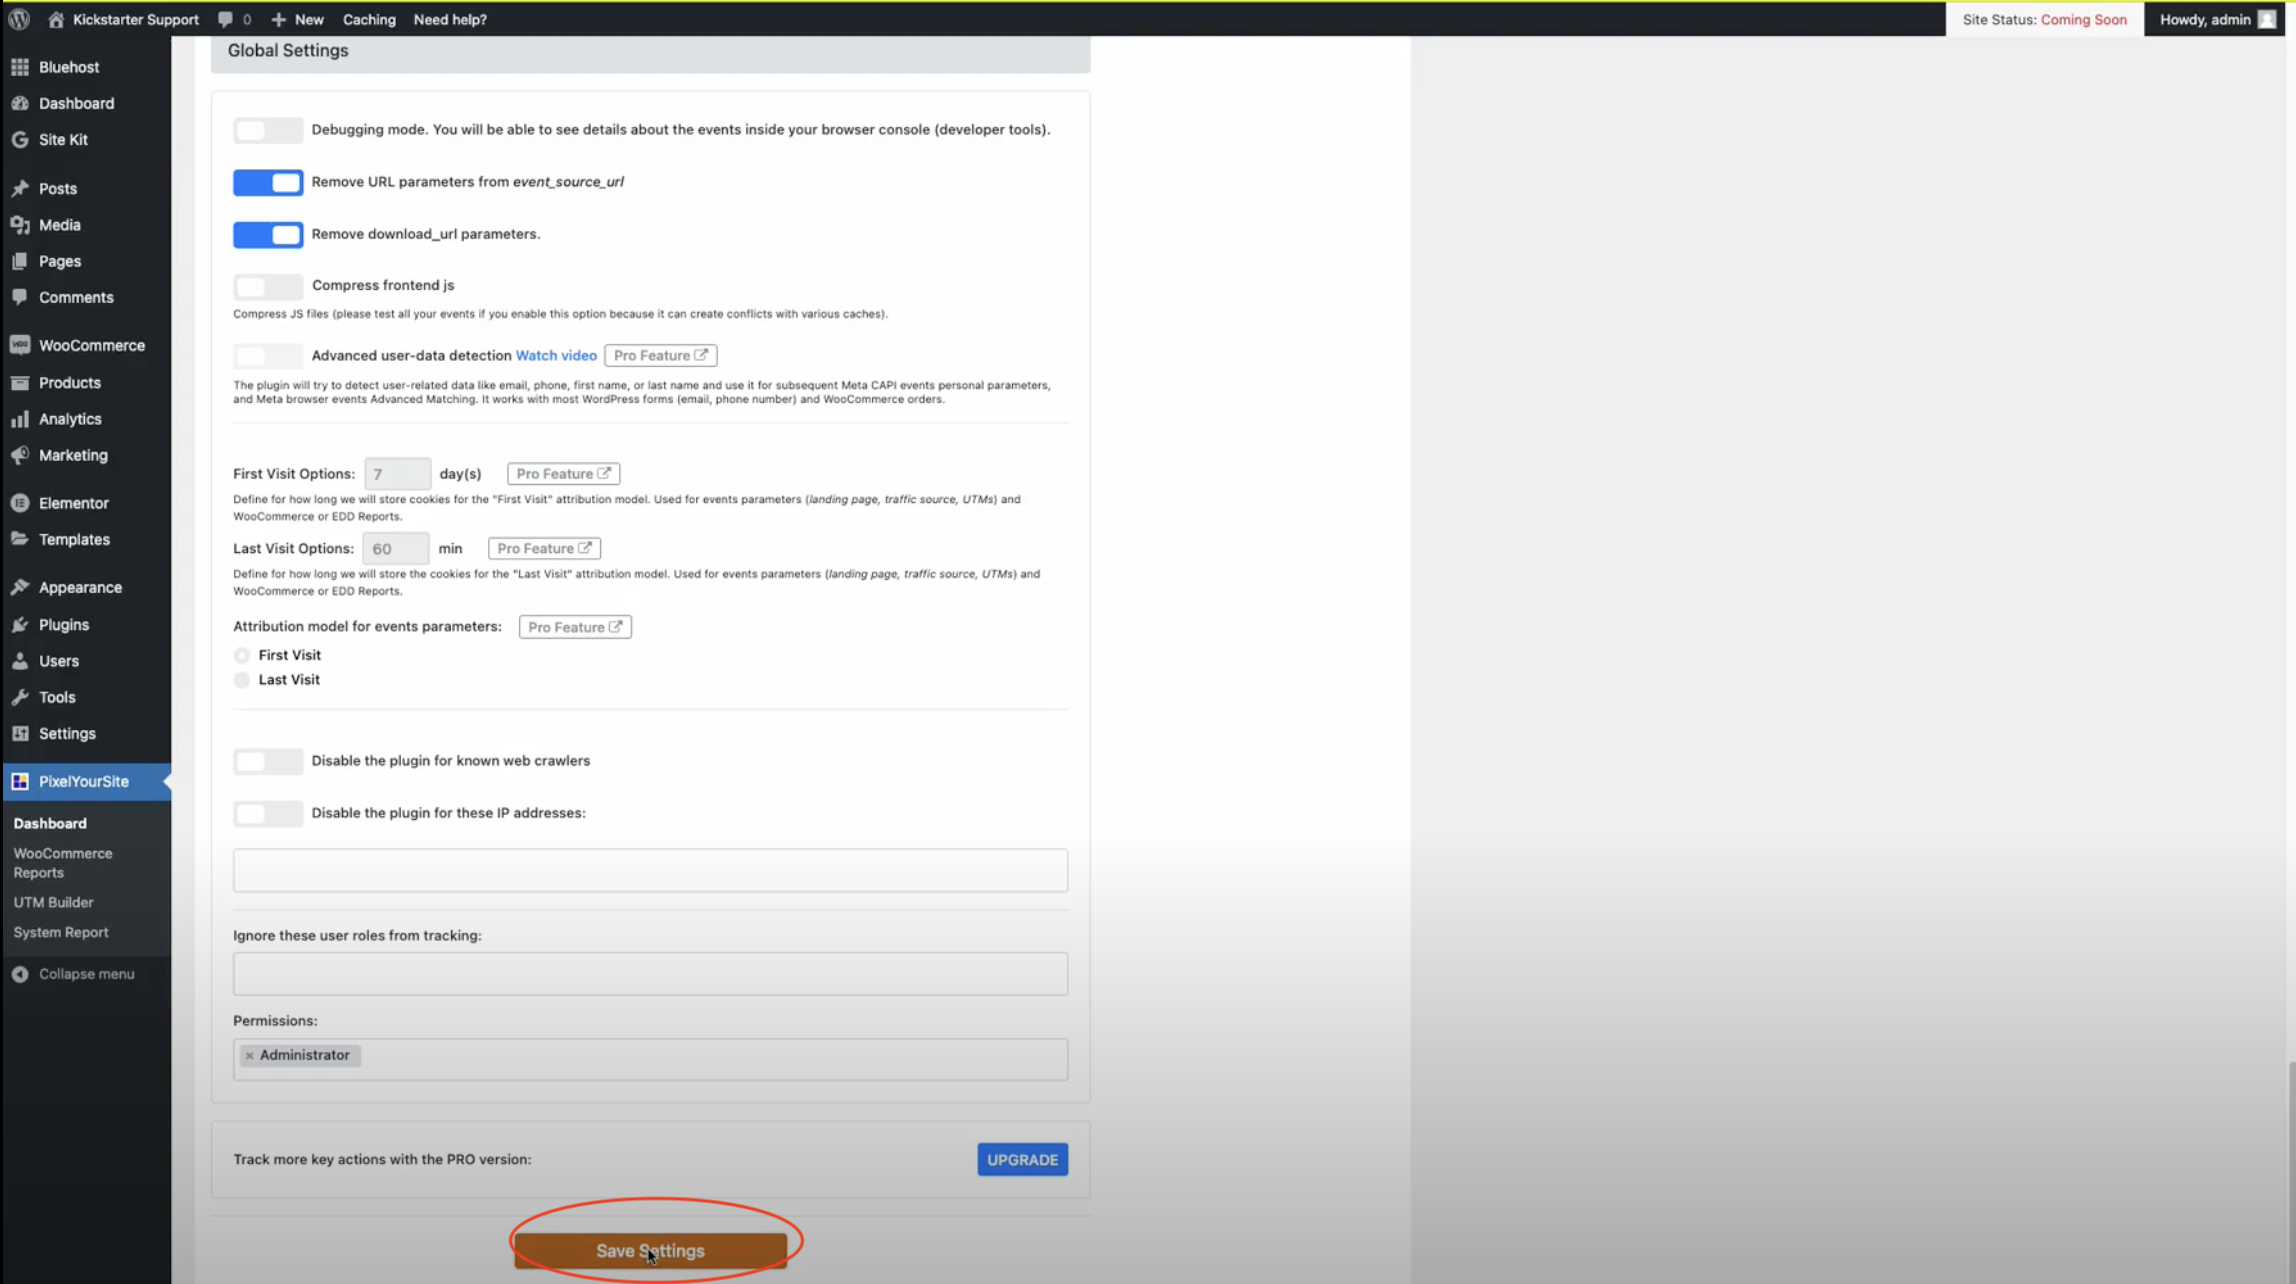
Go to PixelYourSite
Click on settings
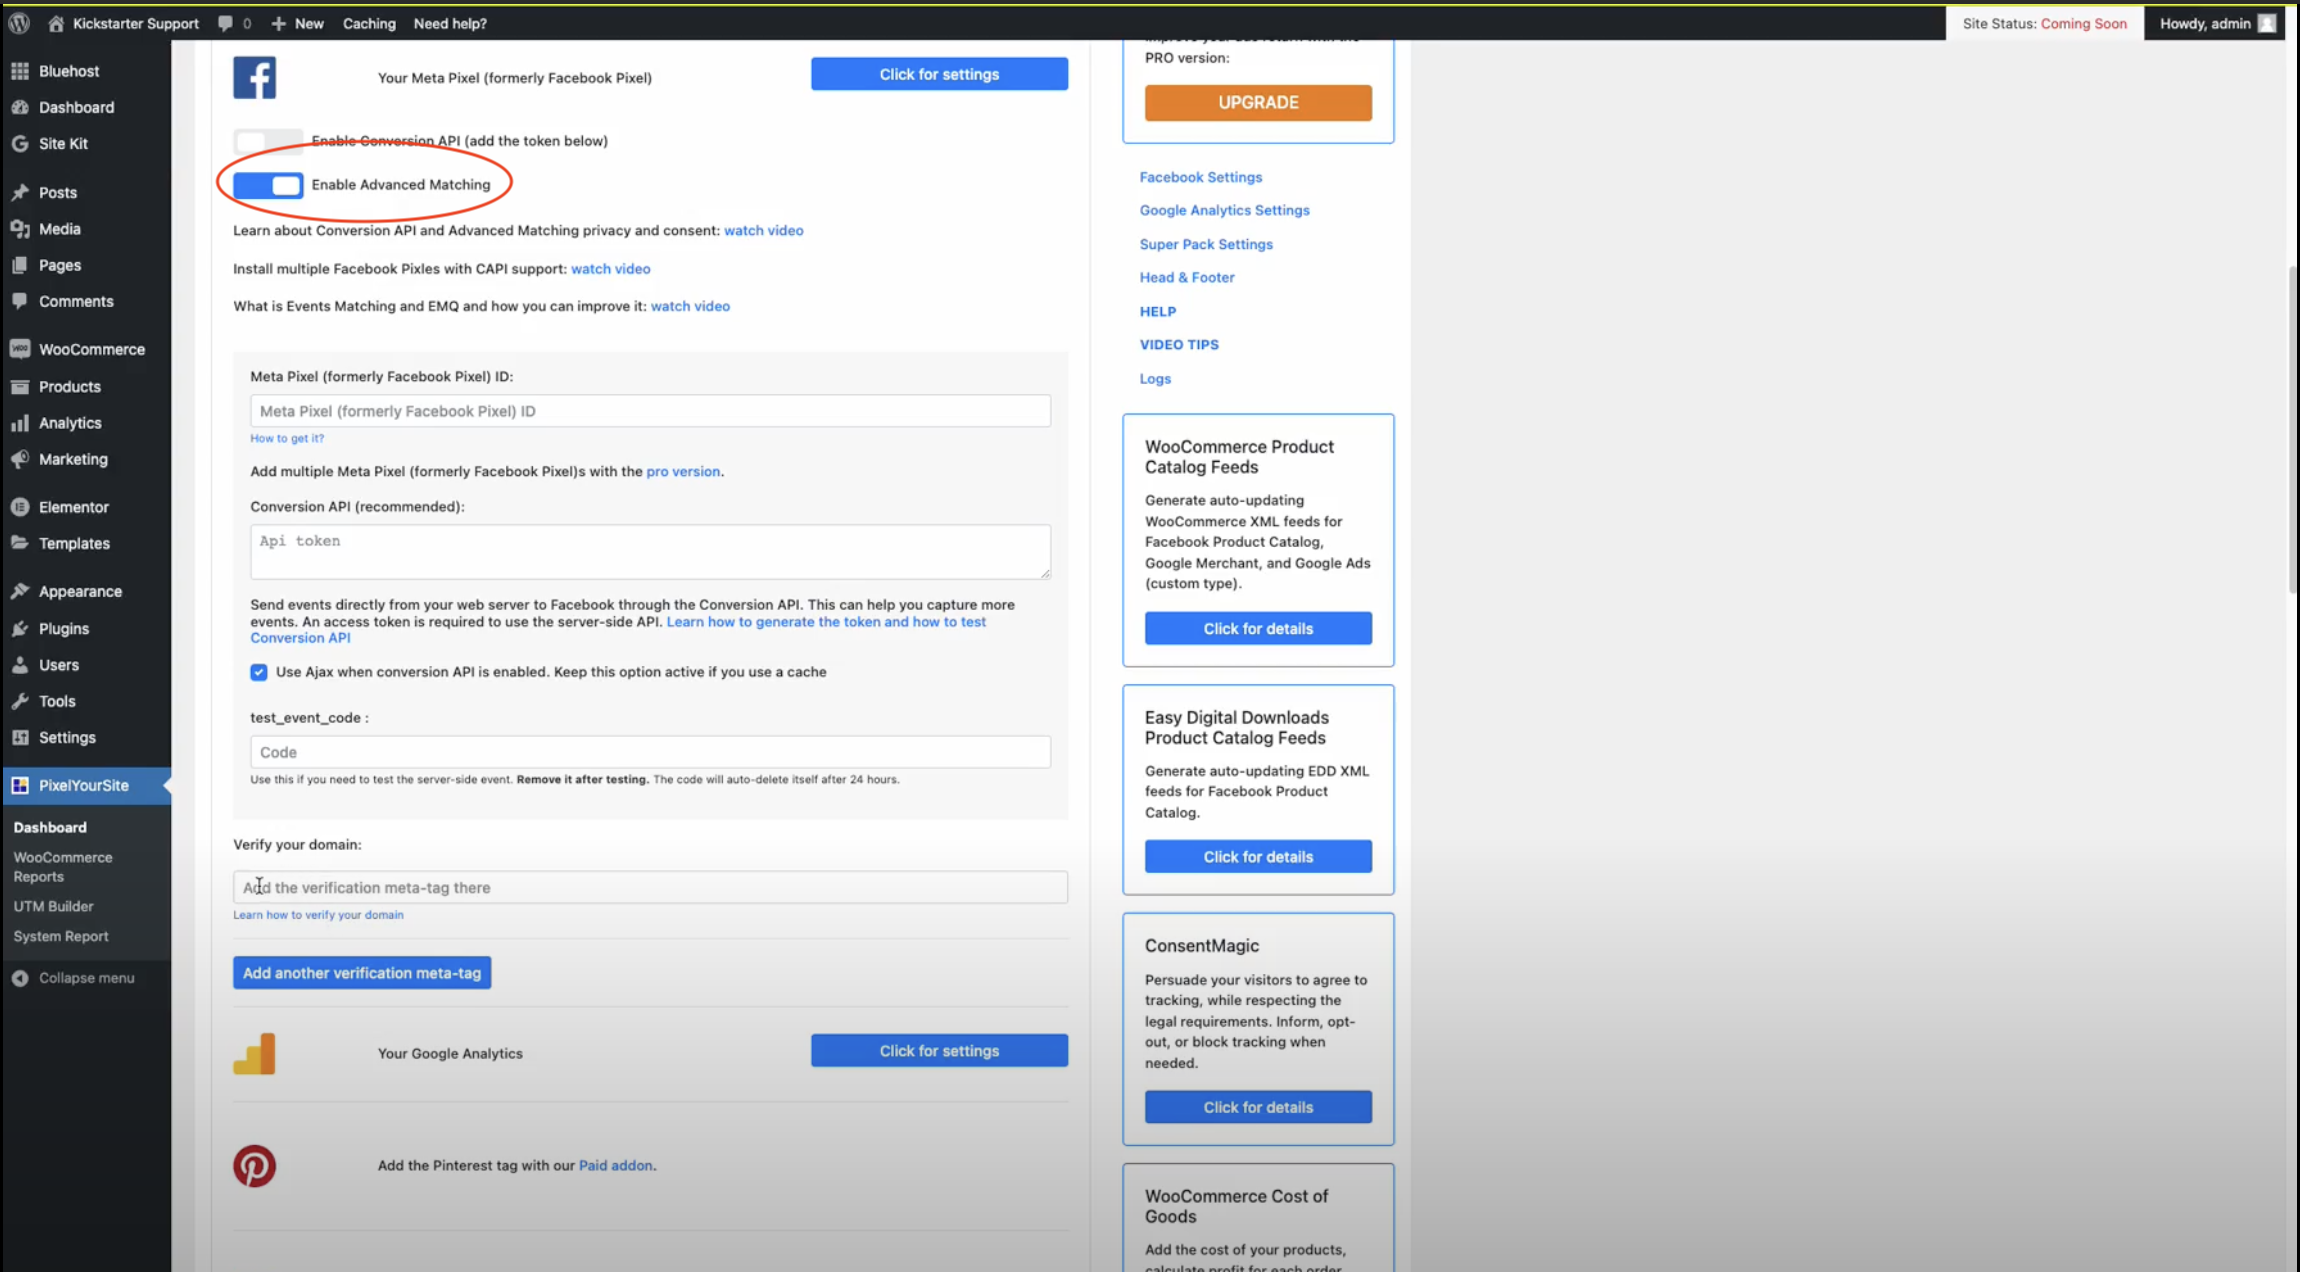
Enable
Advance Matching
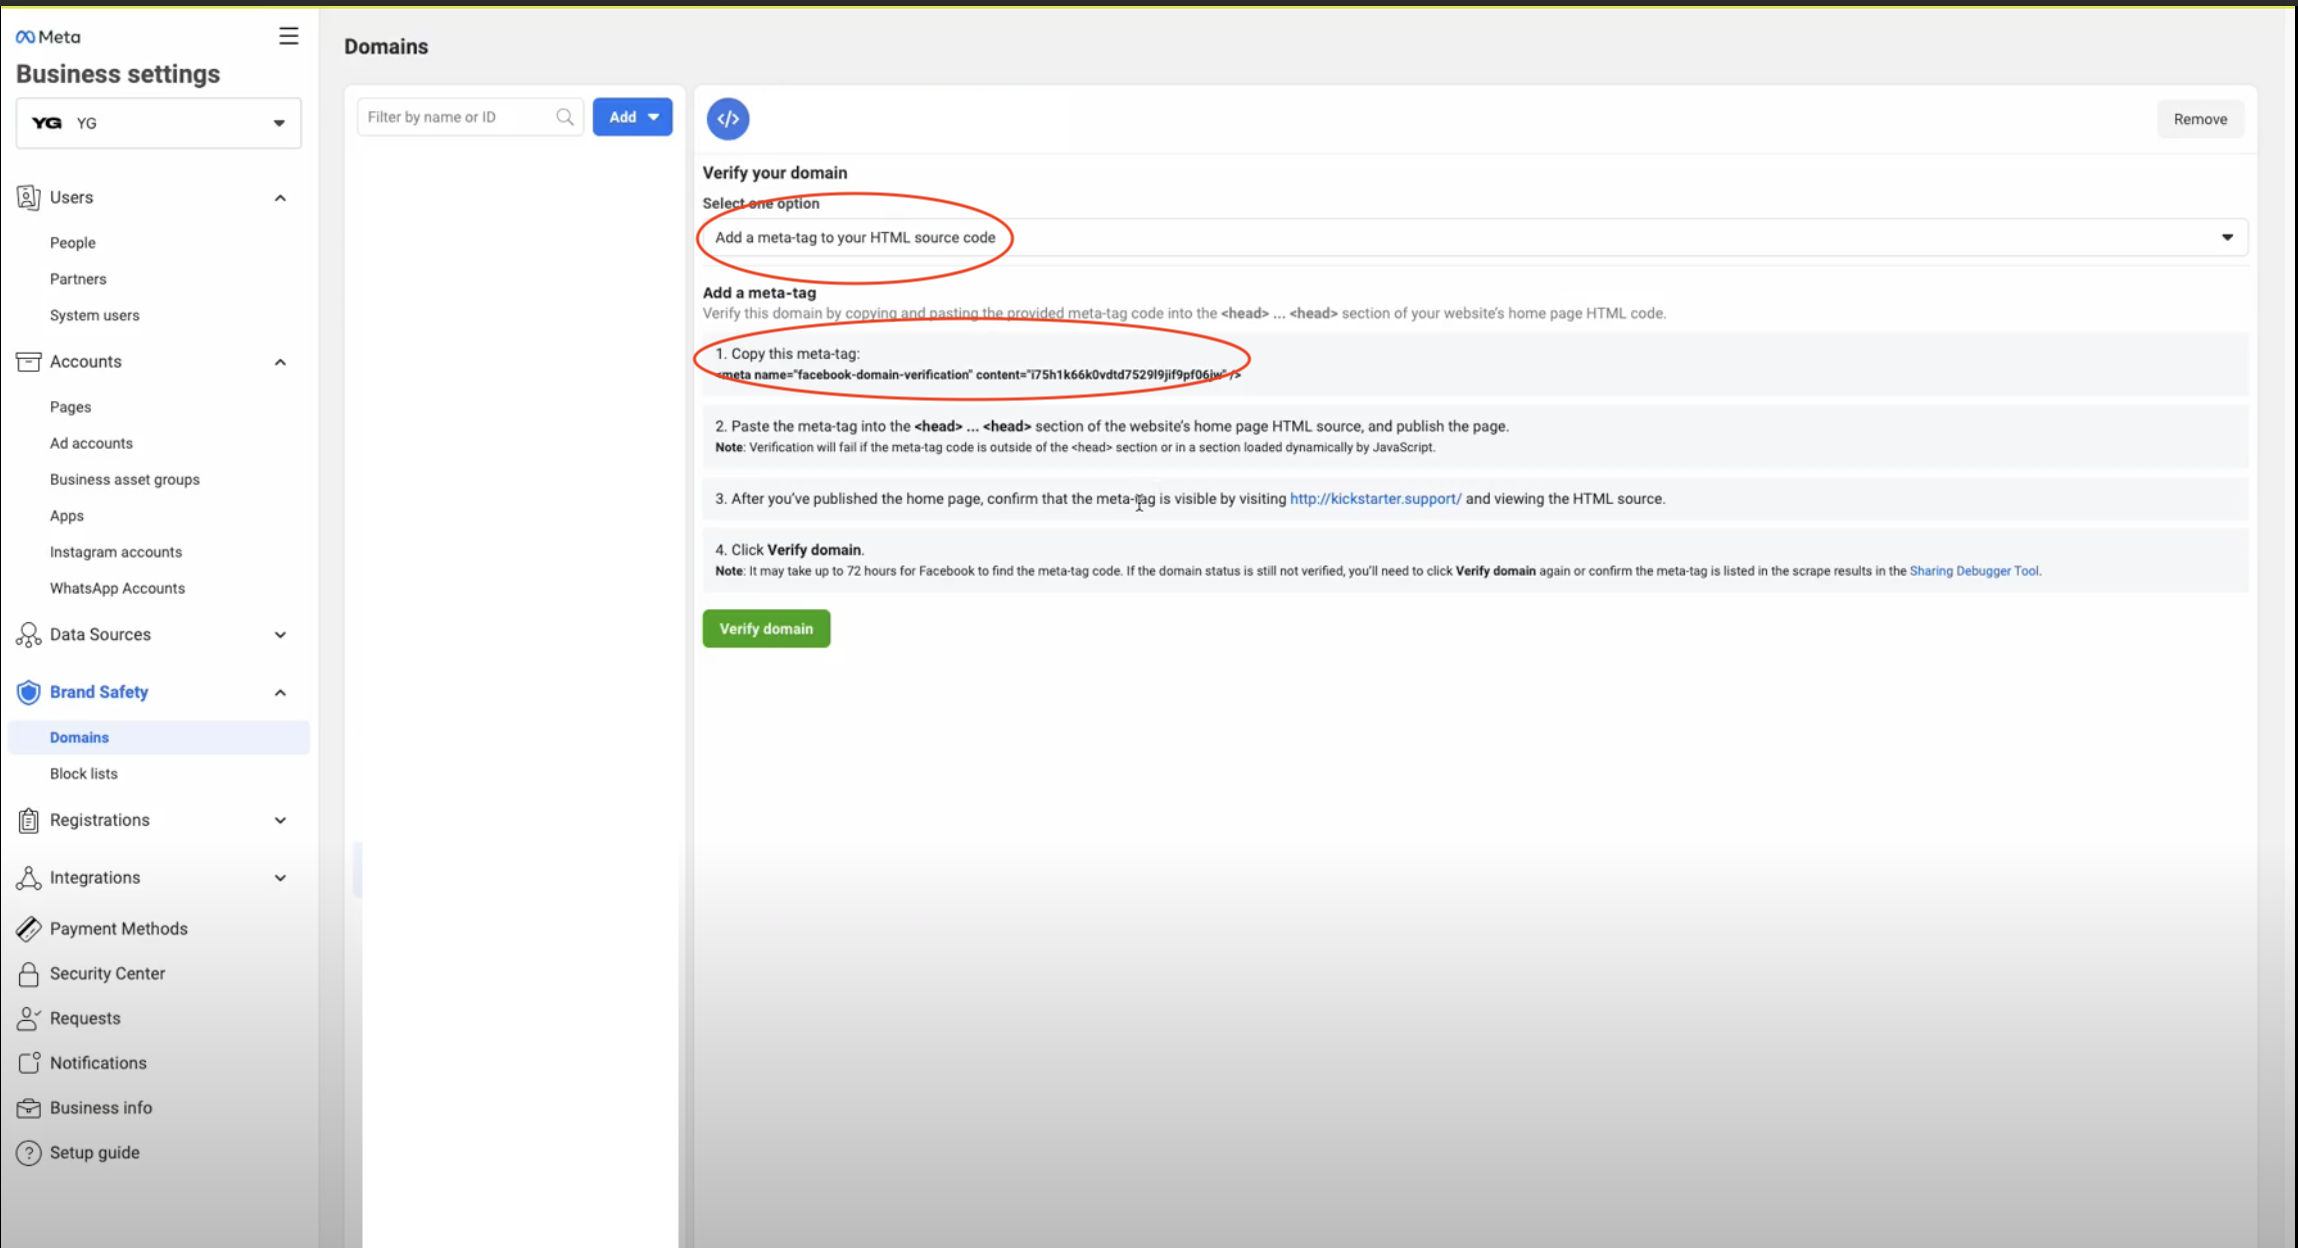
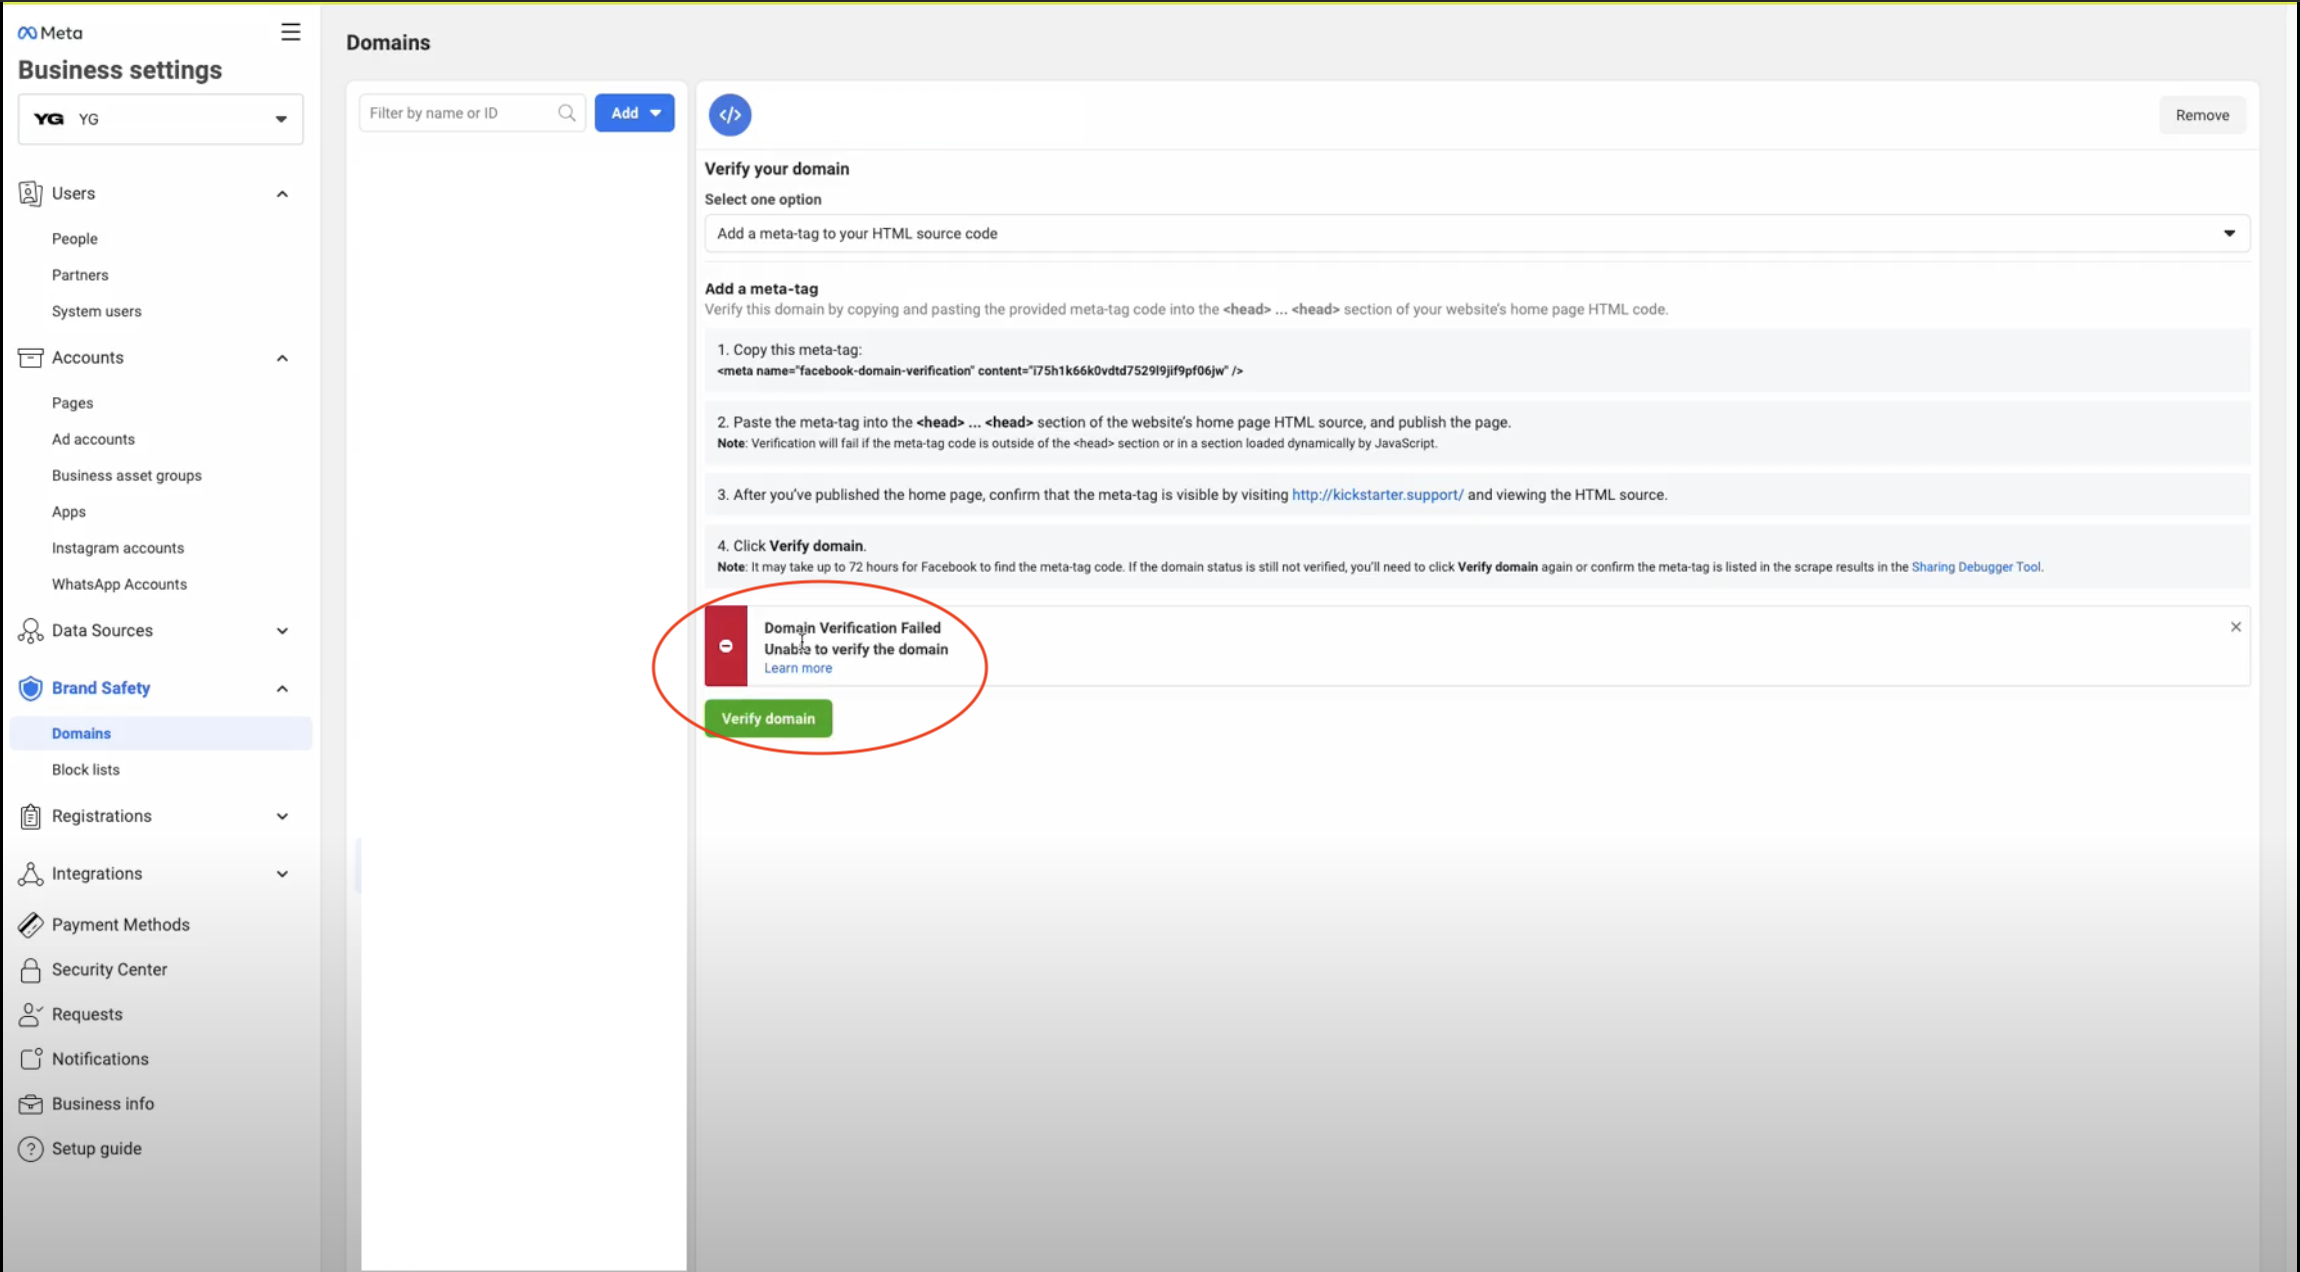
Add the verification meta-tag
You will find it on your Bussiness Manager. Make sure that under select one option the HTML source code is picked, and then simply the meta tag and paste it on PixelYourSite settings.
Save
Save your settings.
Verify domain
For the next step you will need to verify your domain under your Meta Business, but it might take a couple of hours. Give it a try until it goes through.
Setup your Landing Page Meta Pixel
Once the domain is verified it is time to setup your Landing Page Meta Pixel
On your Meta Business, click data sources, pixels, add
Name your pixel
Name your pixel, we recommend Project_Name_Landing_Page, and click continue.
Choose Set up the Pixel Now
Add pixel code
Choose Manually add pixel code to website
Continue
Click continue.
Hit close, don't cancel
Close the window.
Copy id
Copy the pixel id.
Go back to PixelYourSite
Paste your Meta Pixel id.
Save settings
Click Save Settings.
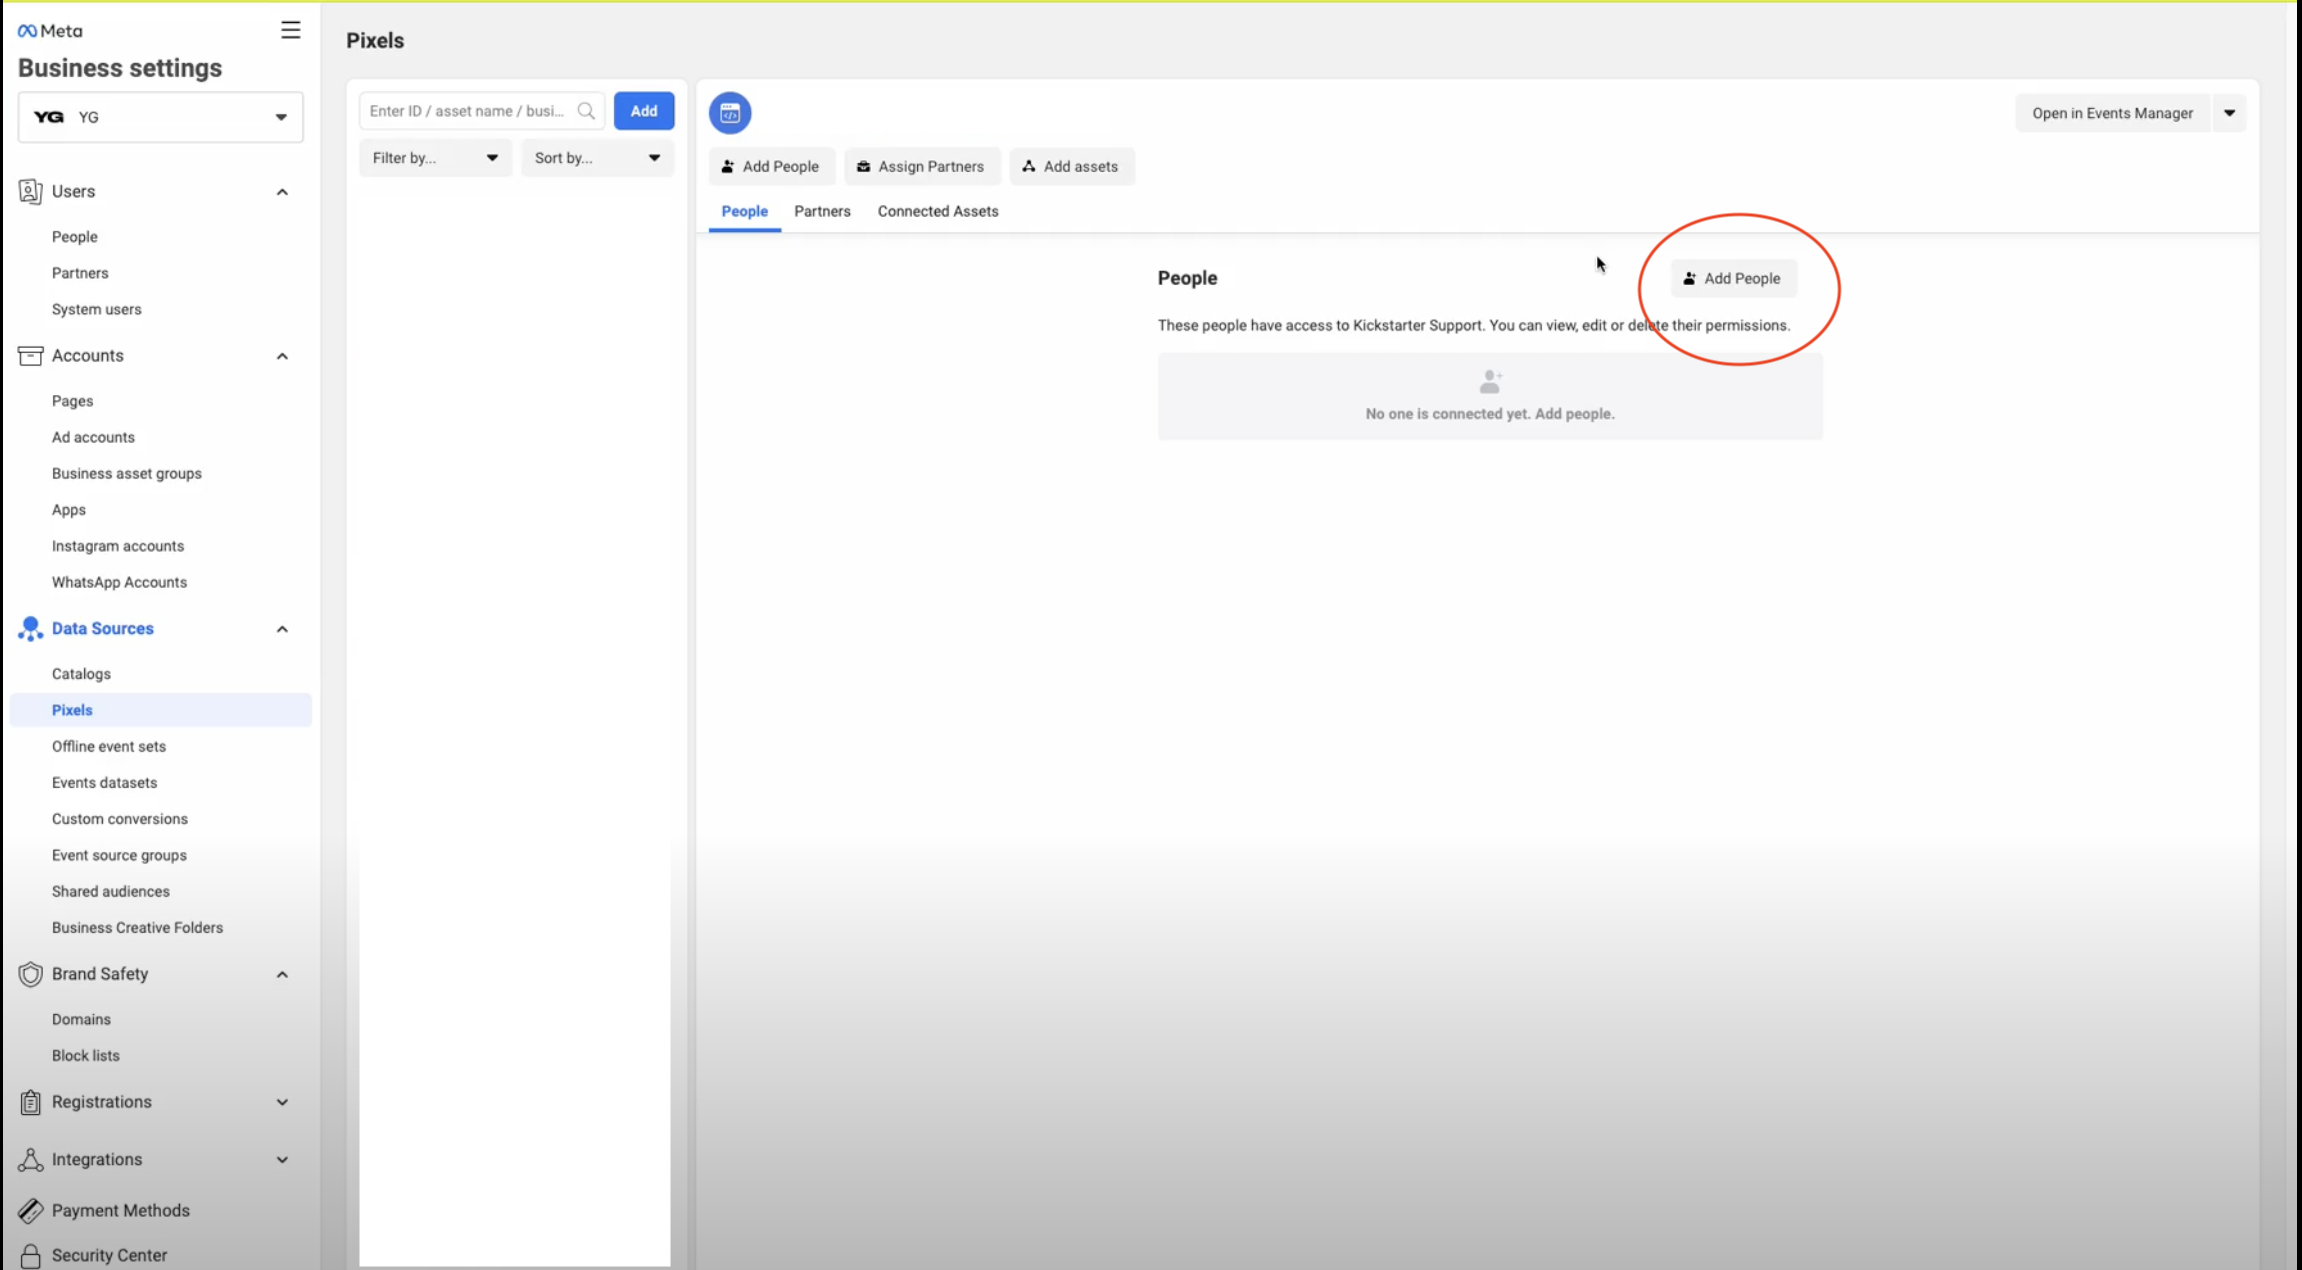
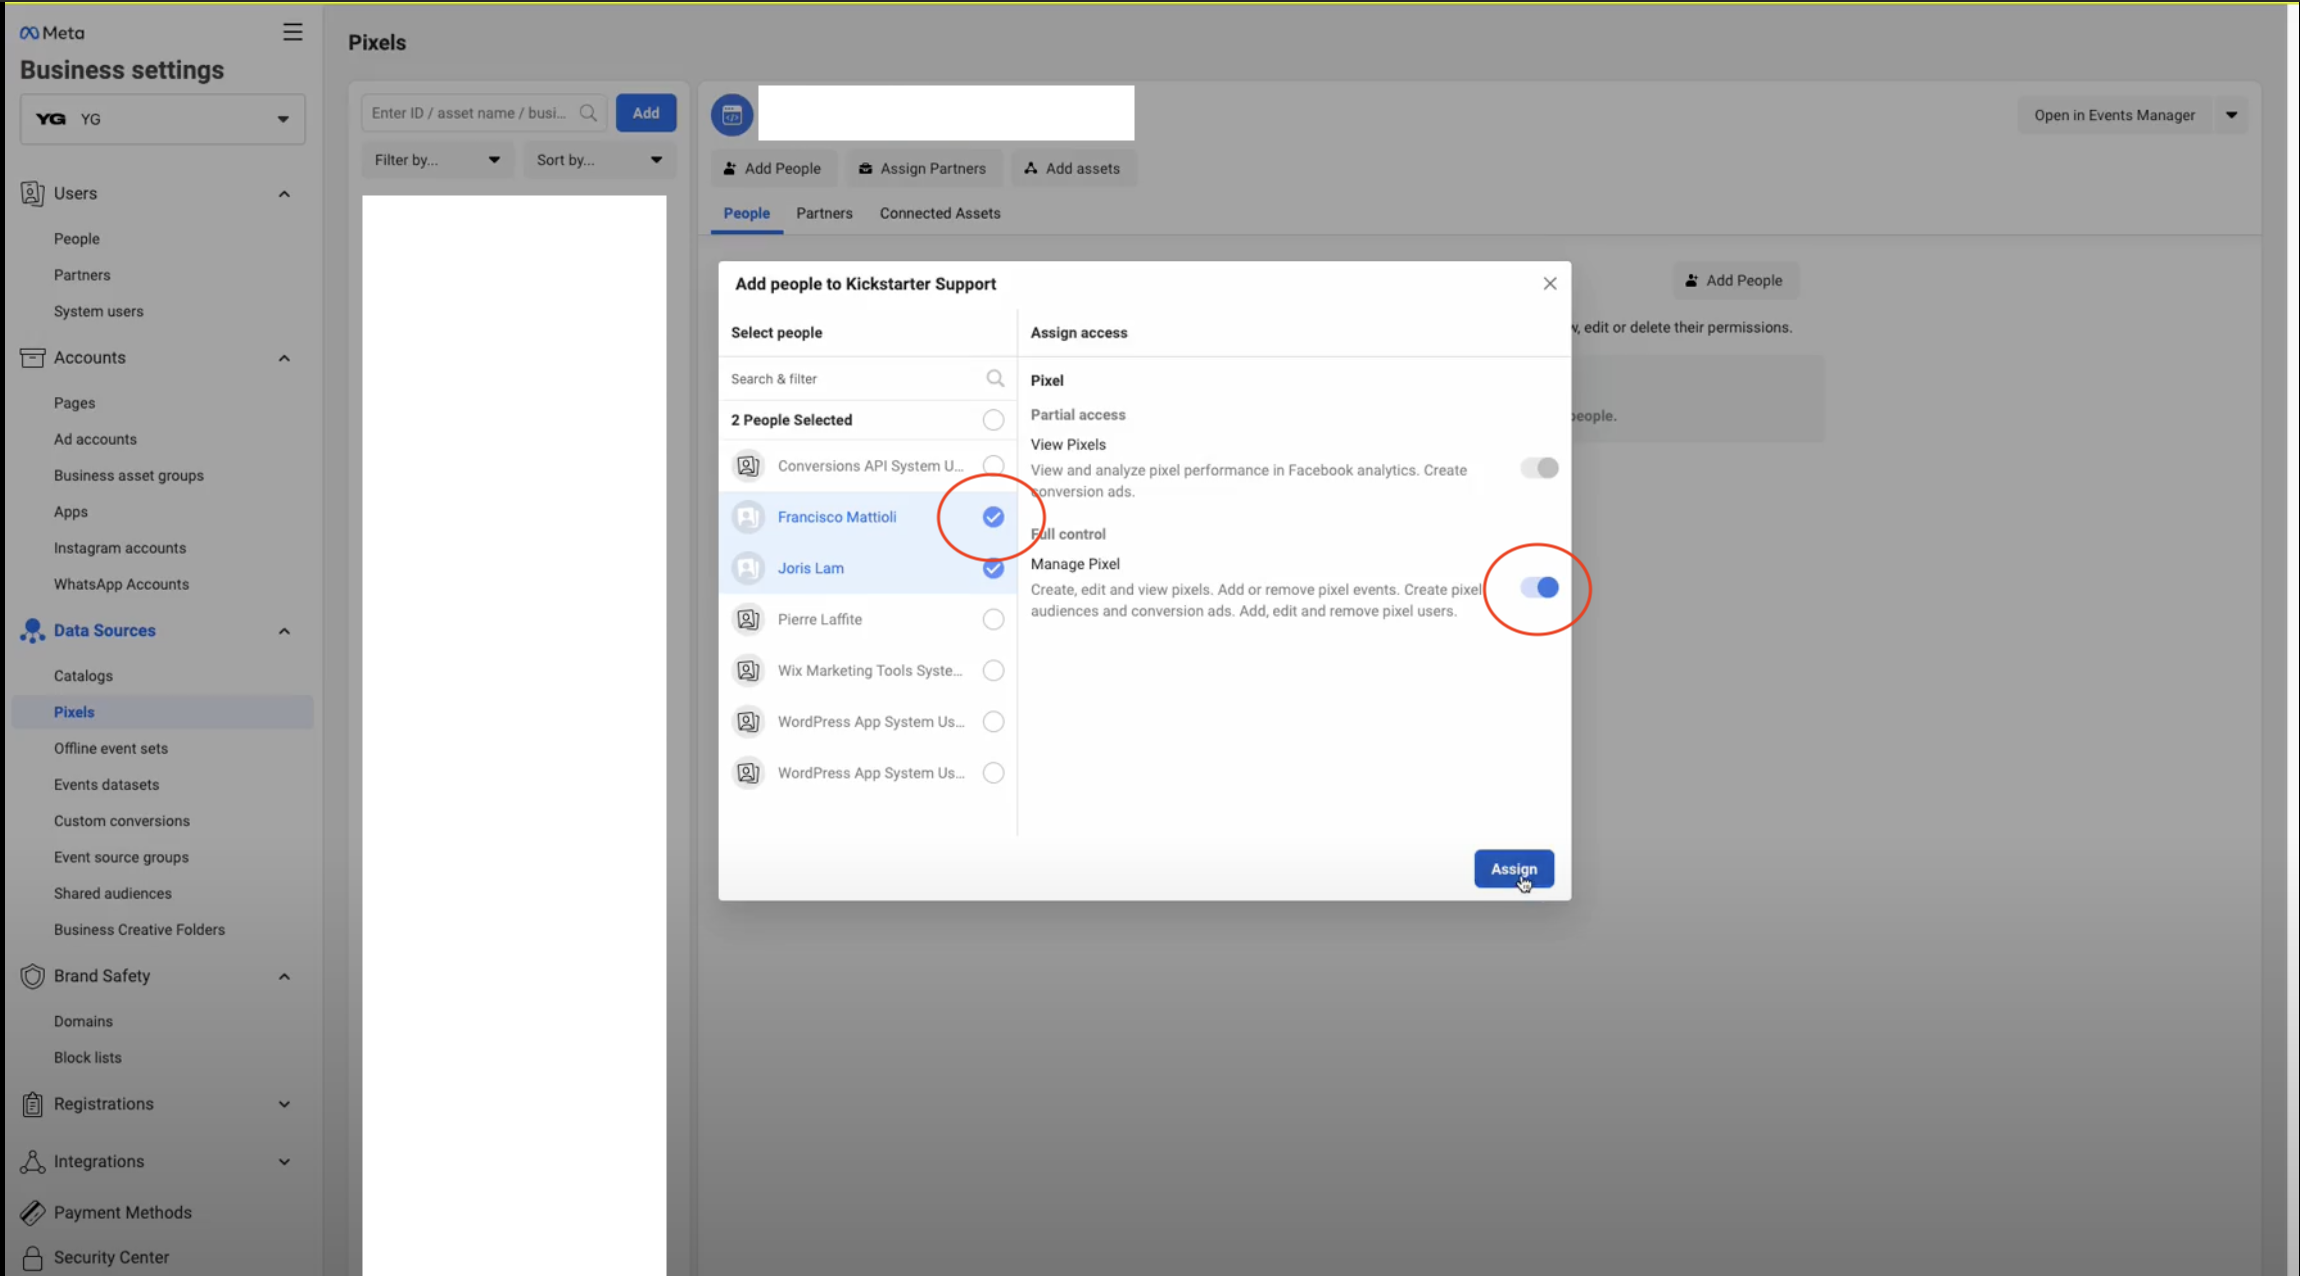
Go to your Meta Business Account
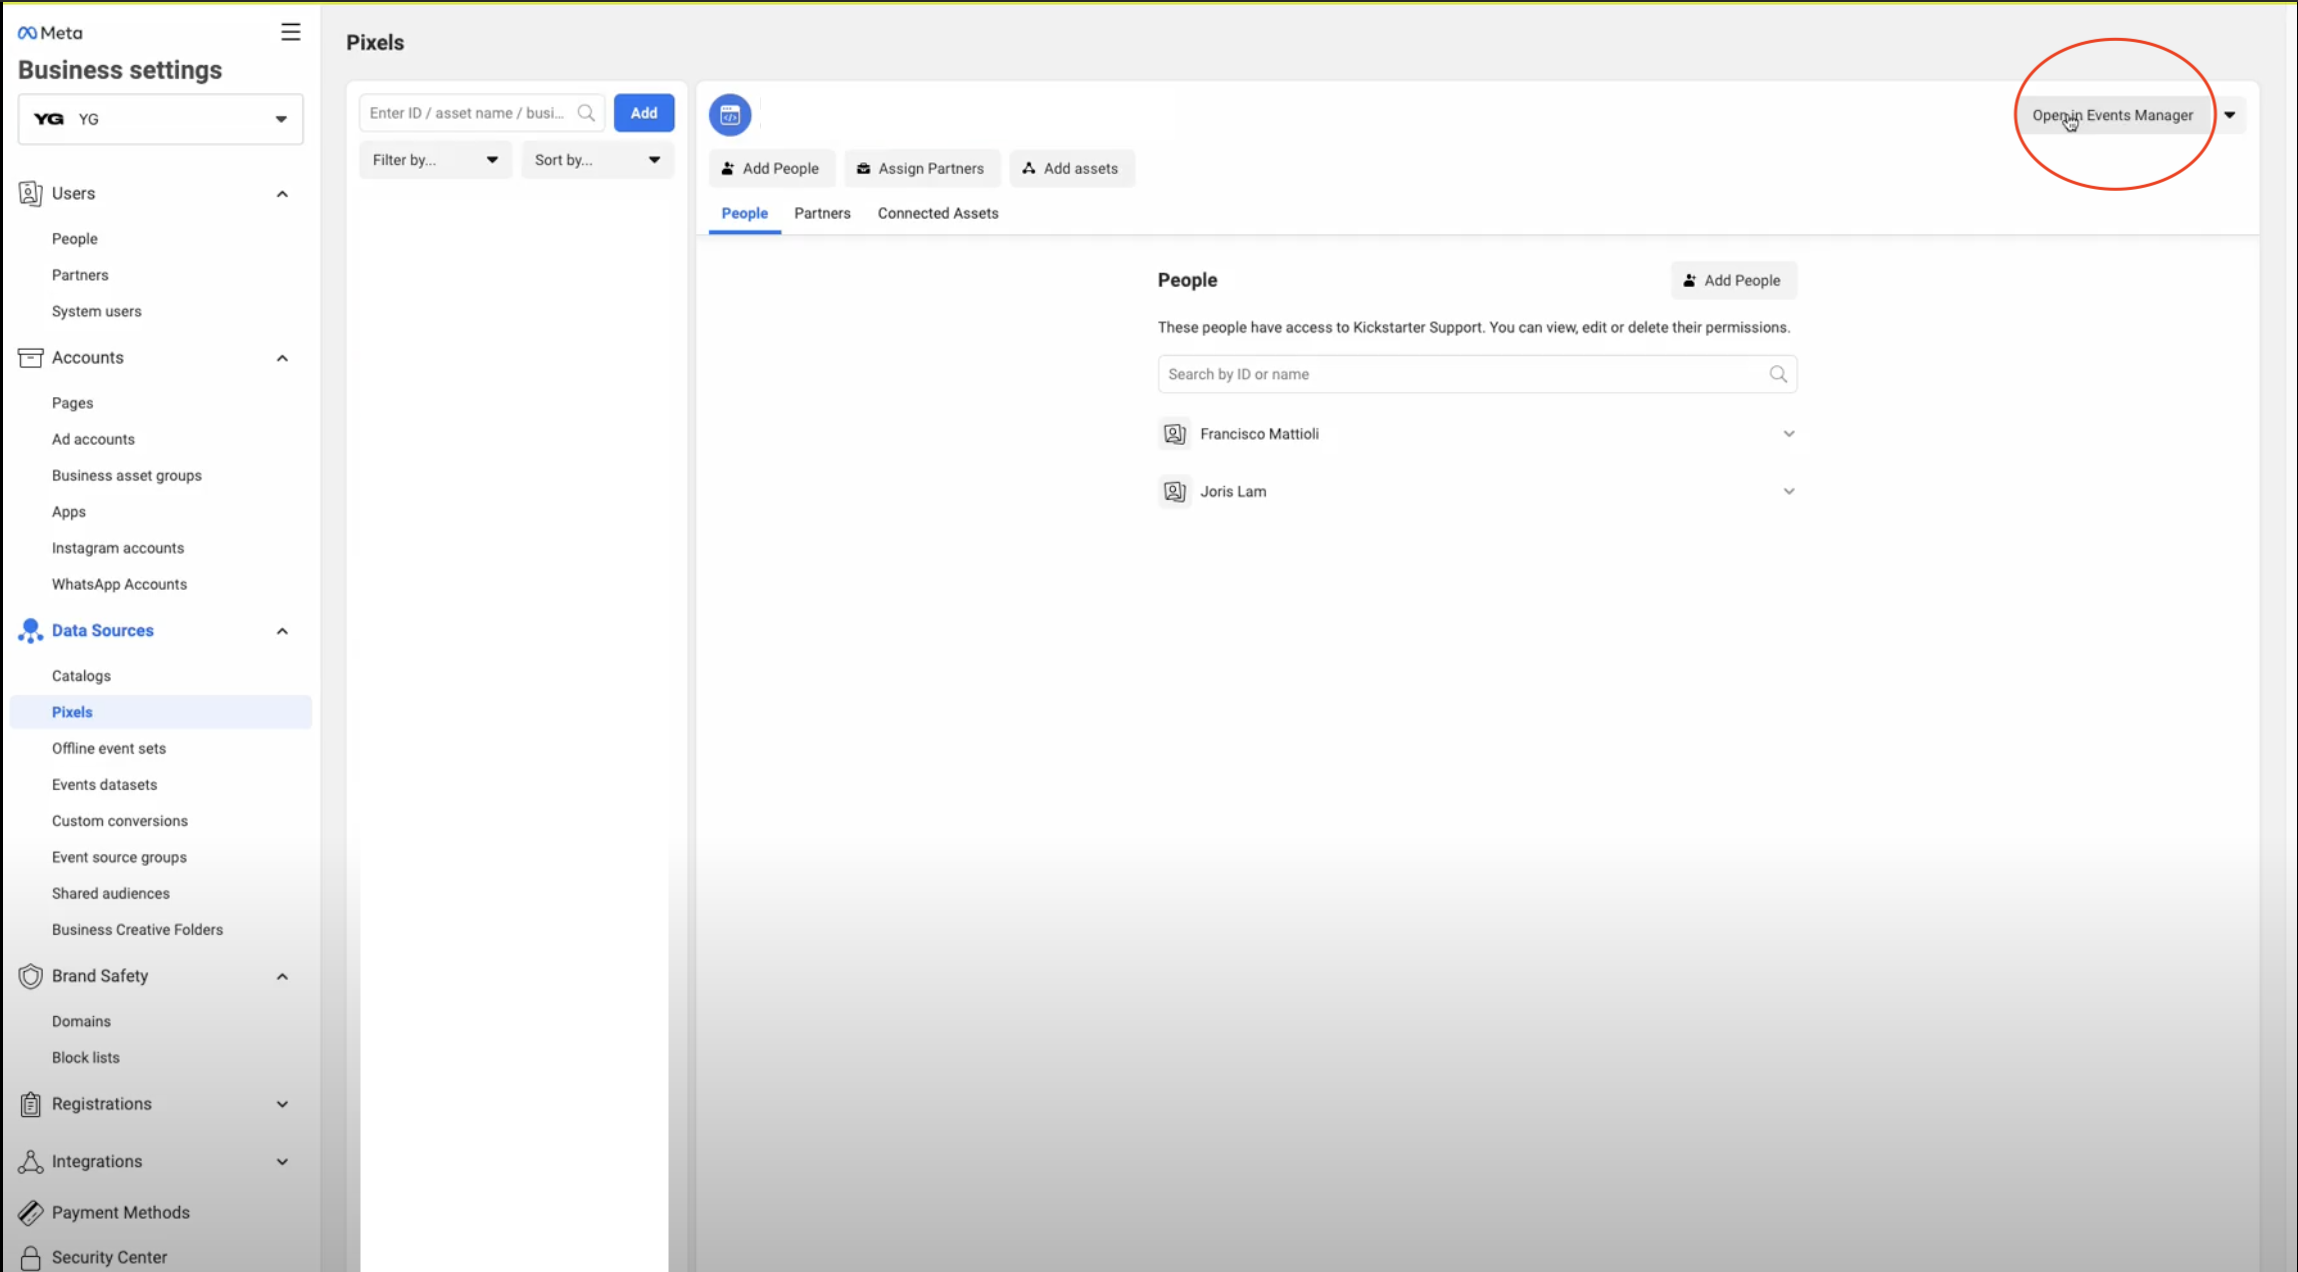
Click on add people, add yourself and anty other relevant team members. and toggle Manage Pixel before clicking Assign
Click on Open Events Manager
If your domain isn’t verified you wont be able to complete this step
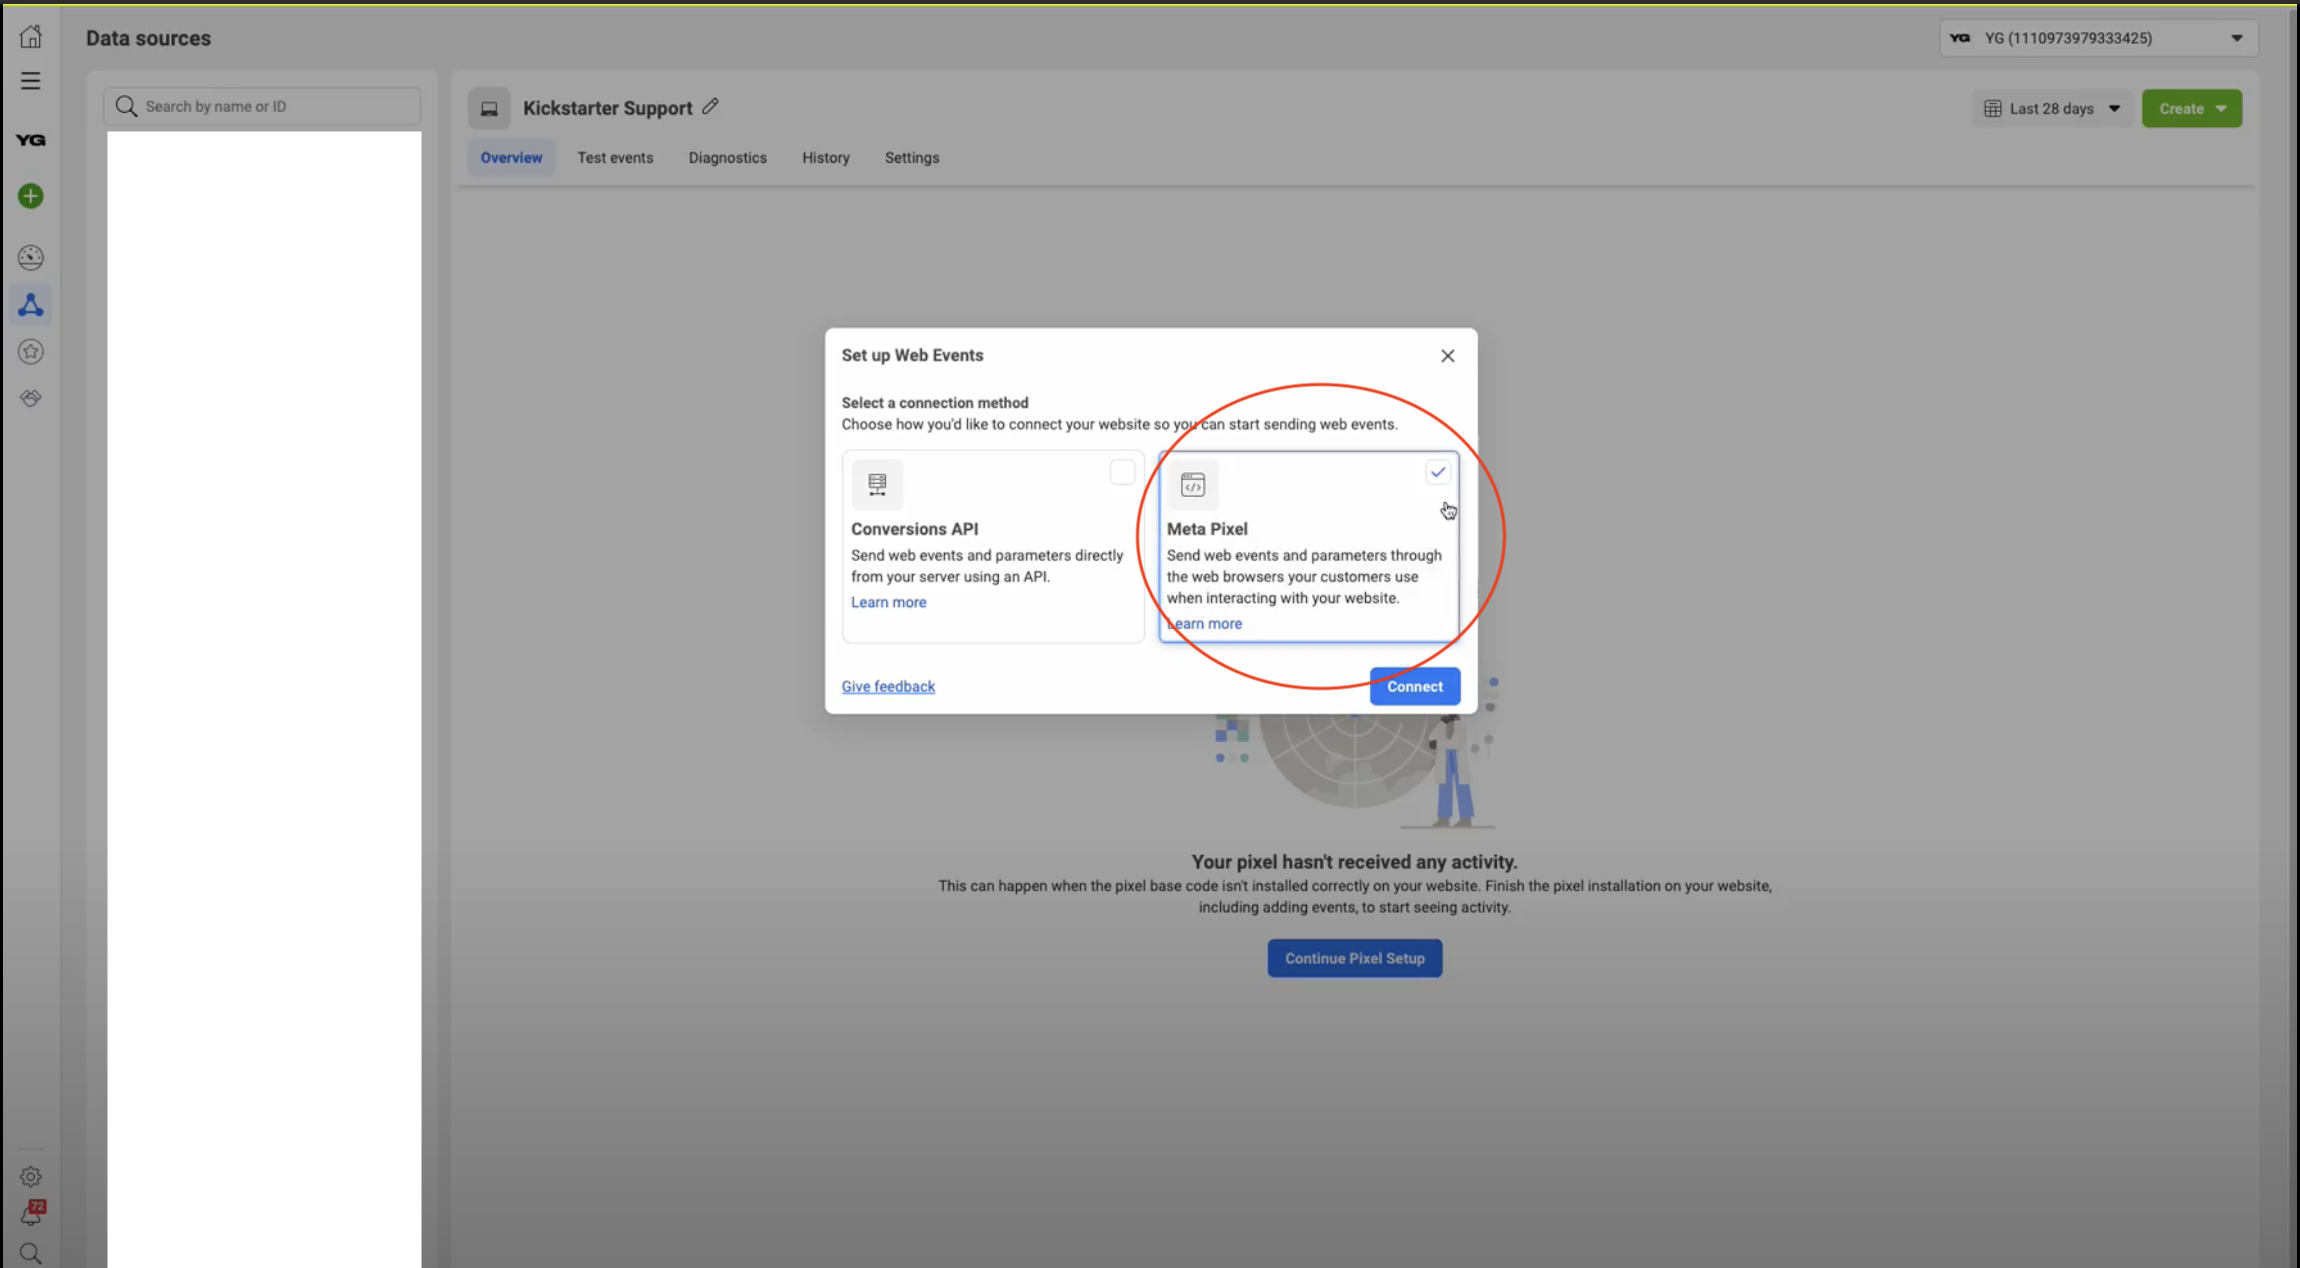
Continue the setup
Click Continue Pixel Setup
Meta Pixel
Select Meta Pixel.
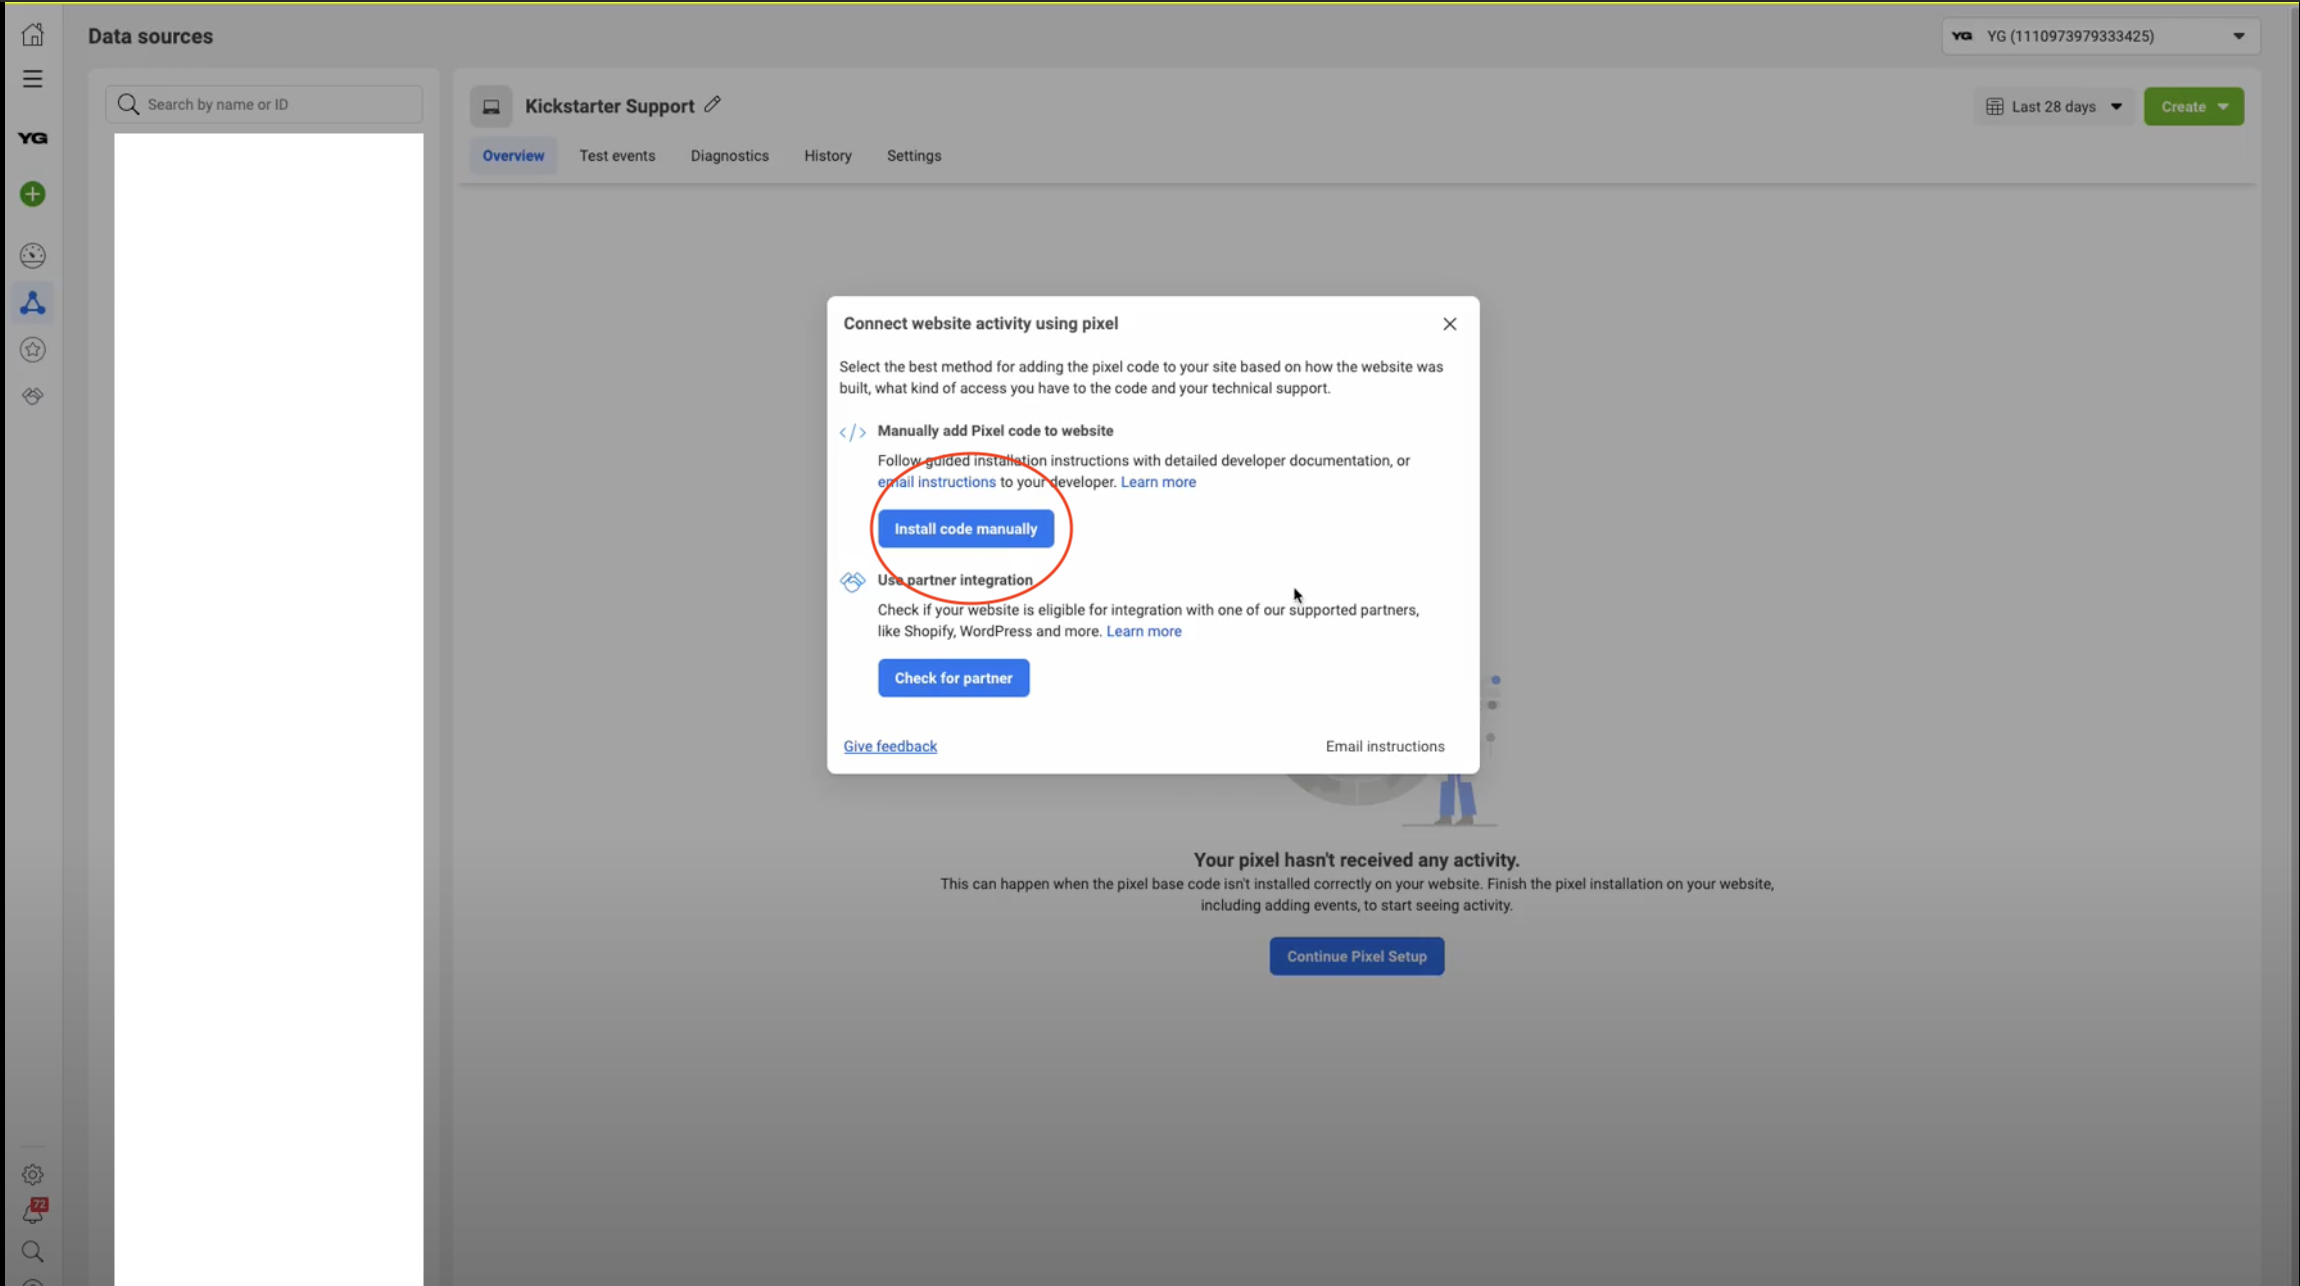
Install code
Click Install code manually
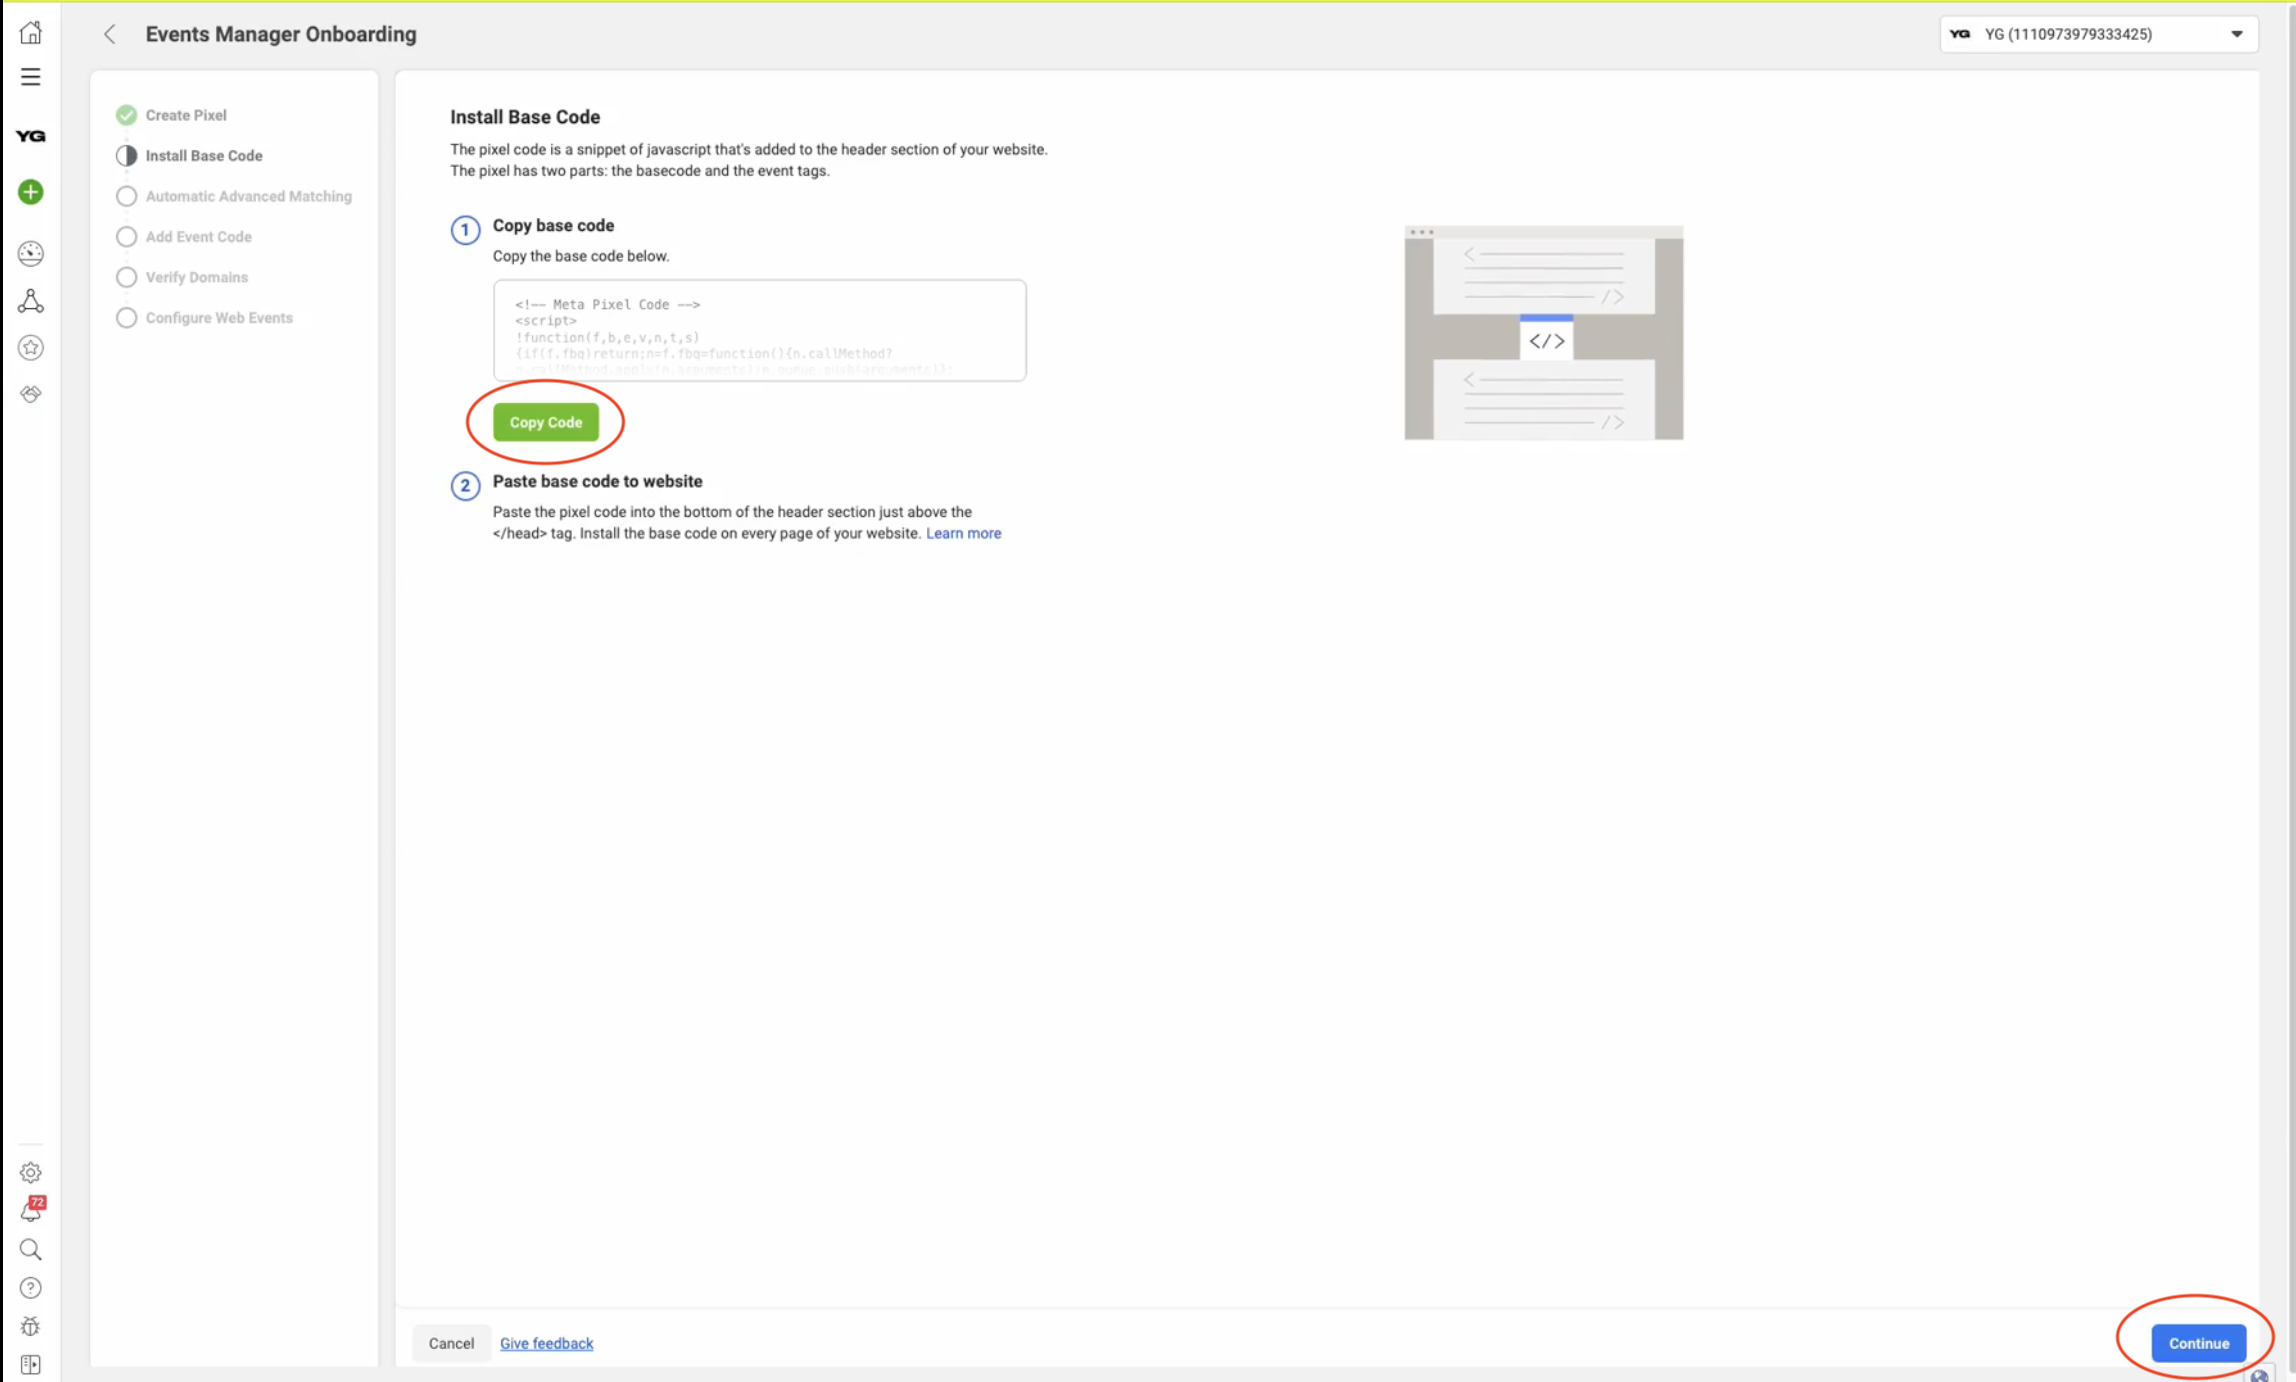
Copy code
Attention although the plugin does this step for you, you still need to copy the code so continue to become available
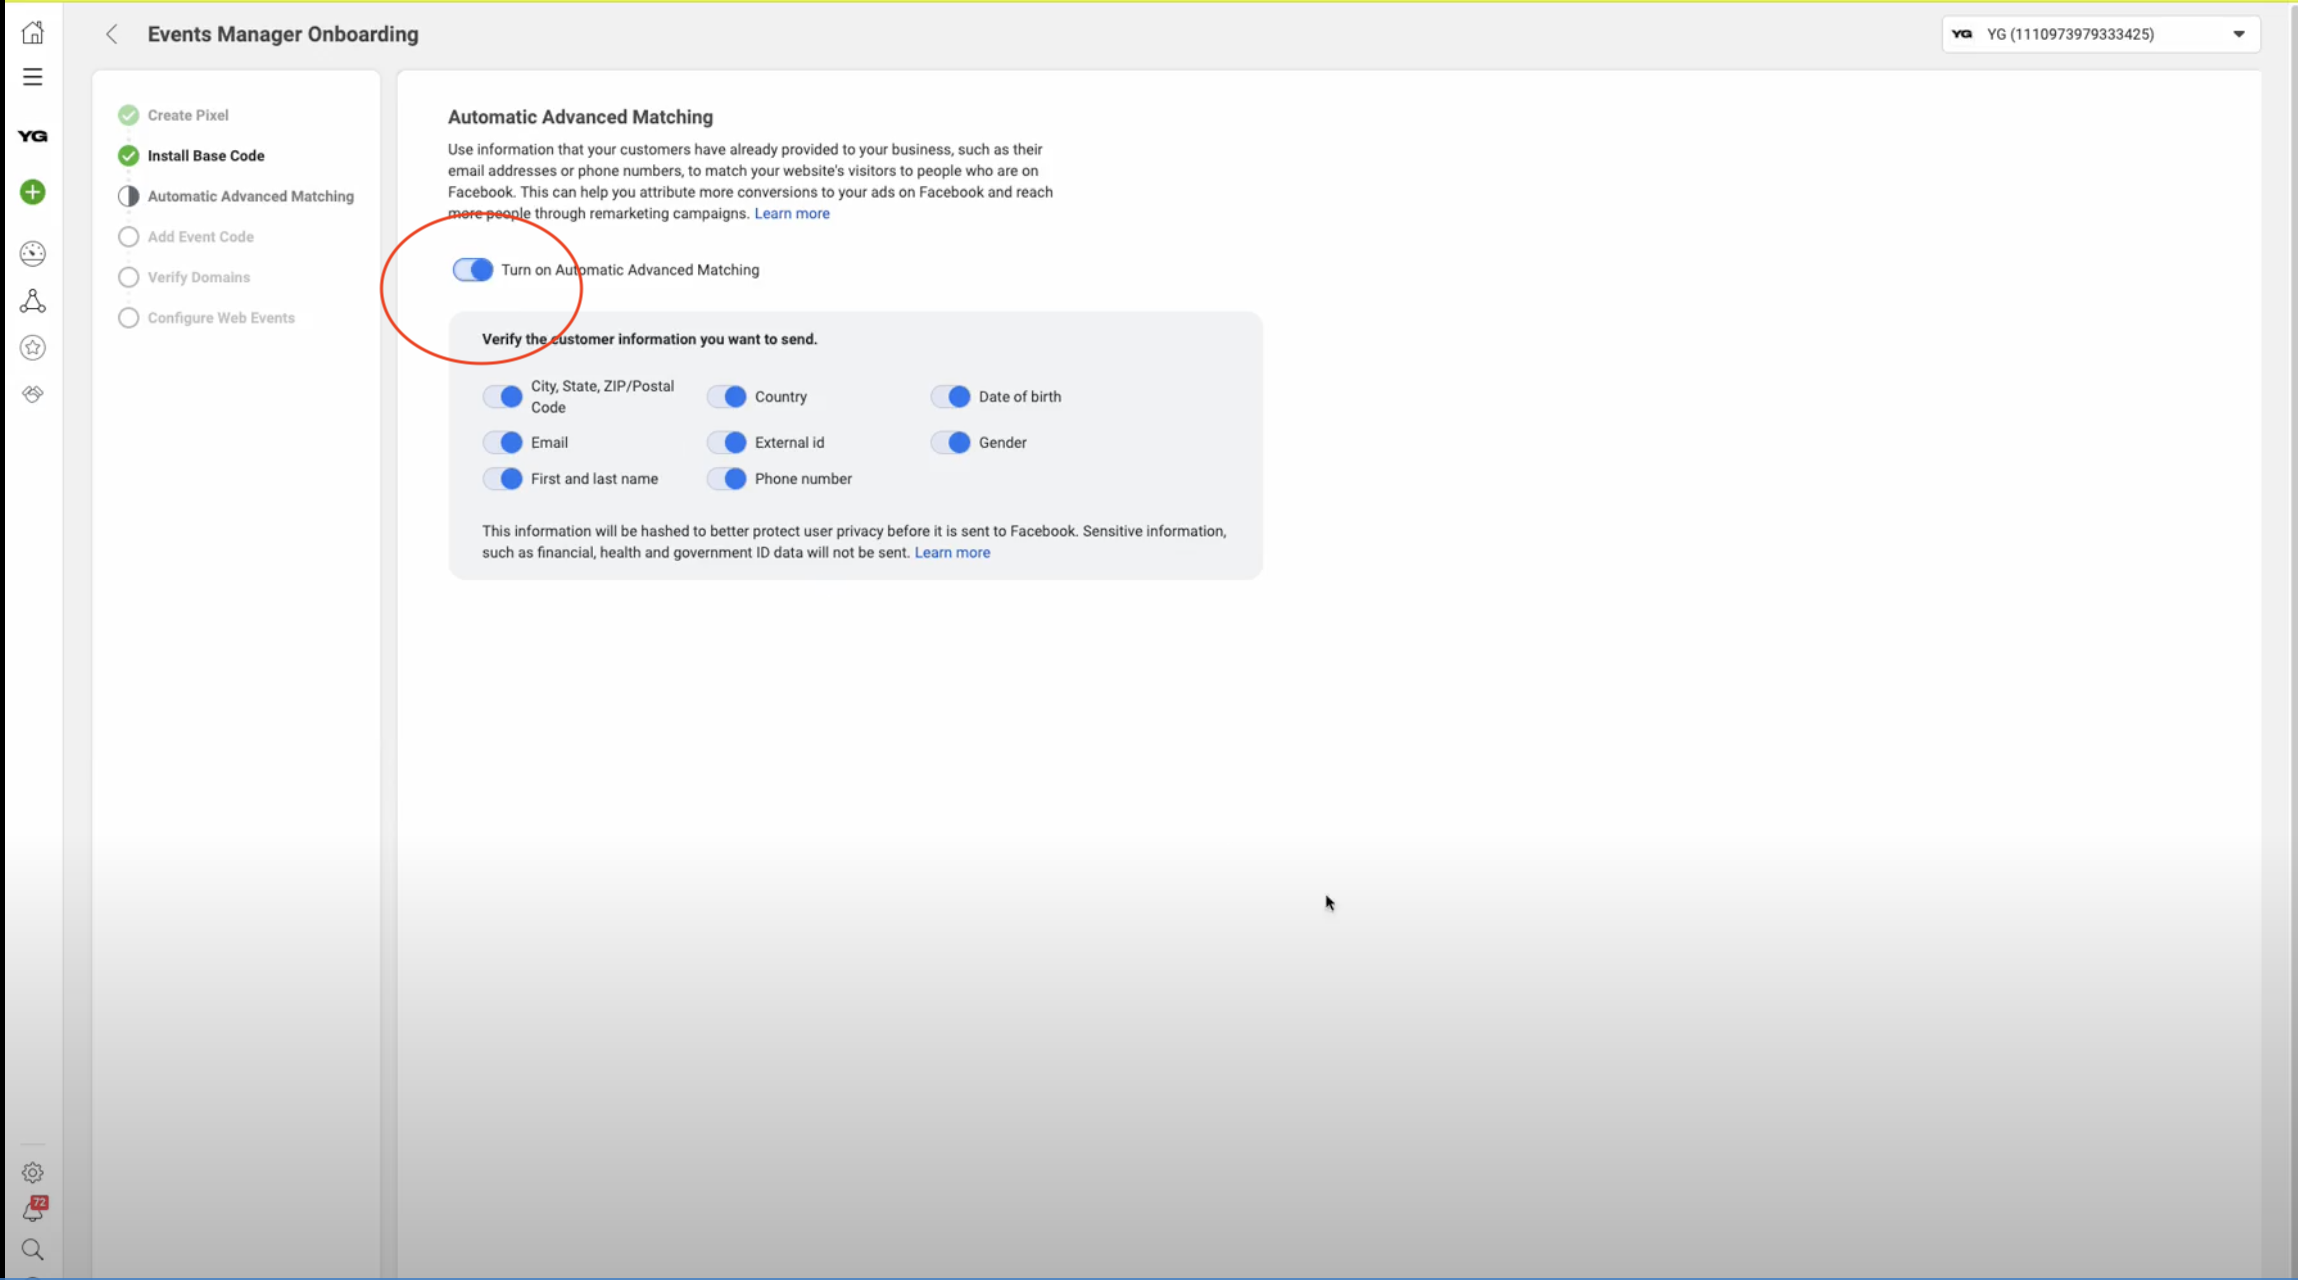
Automatic advanced matching
Toggle turn on automatic advanced matching and continue.
Add event code
Under Add Event Code simply click on continue.
Verify Domains
The same thing for Verify Domains, the domain should be verified, but just in case you can click verify domain and afterward continue.
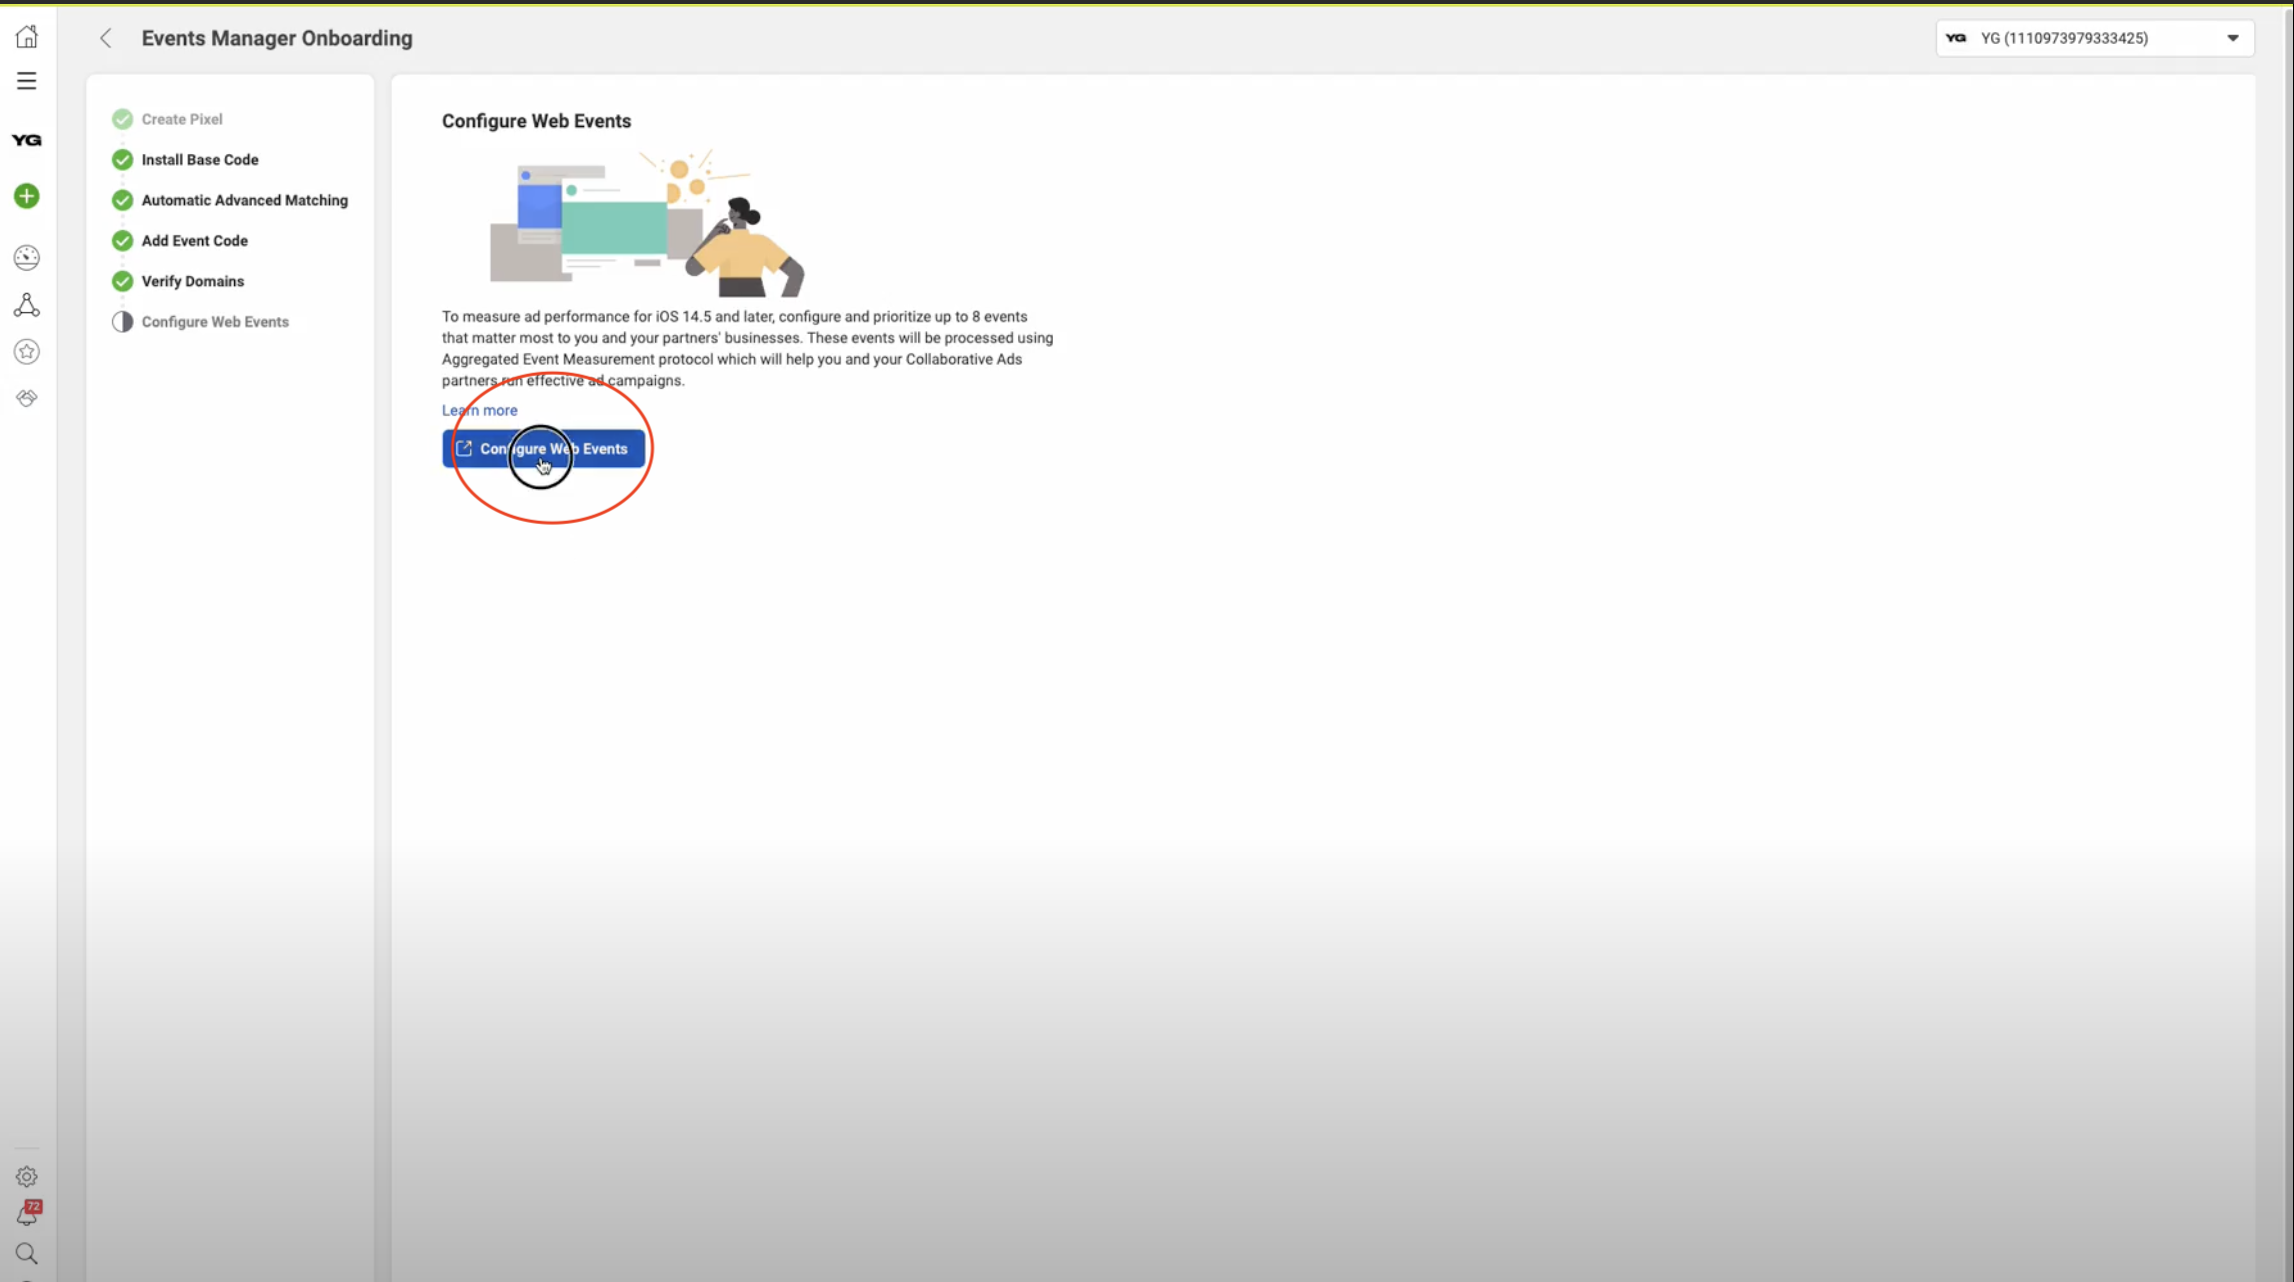
Configure
Click configure web events.
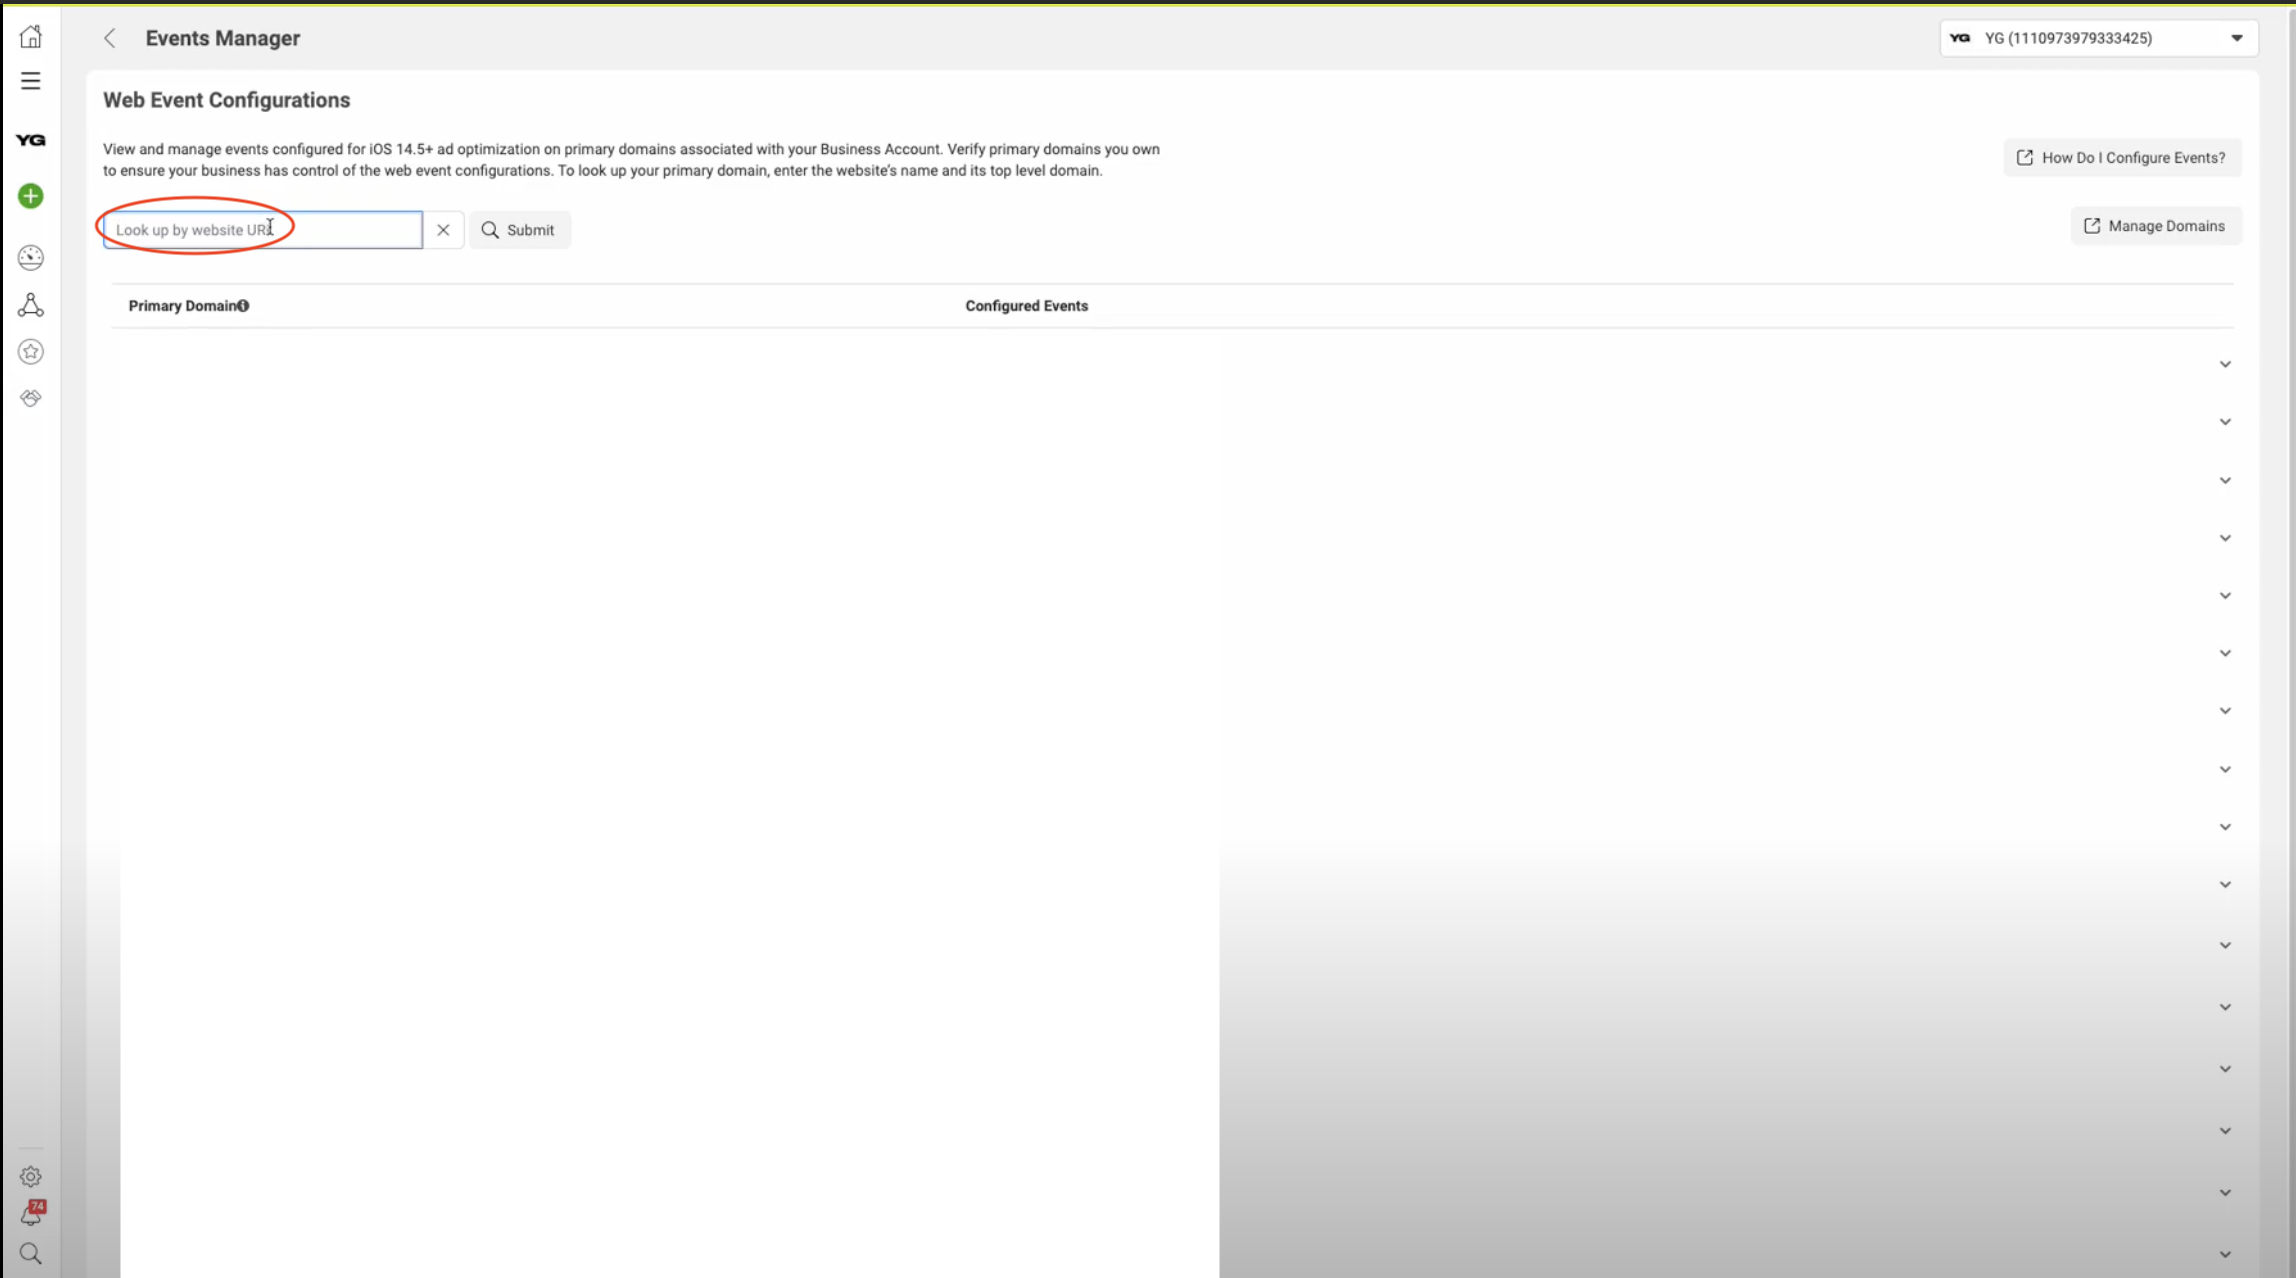
Use your URL
Find your website.
Manage events
Click on it and afterward click on Manage Events.
Edit events
Click edit.
Add event
Click Add event.
Activate Pixel
Choose your pixel.
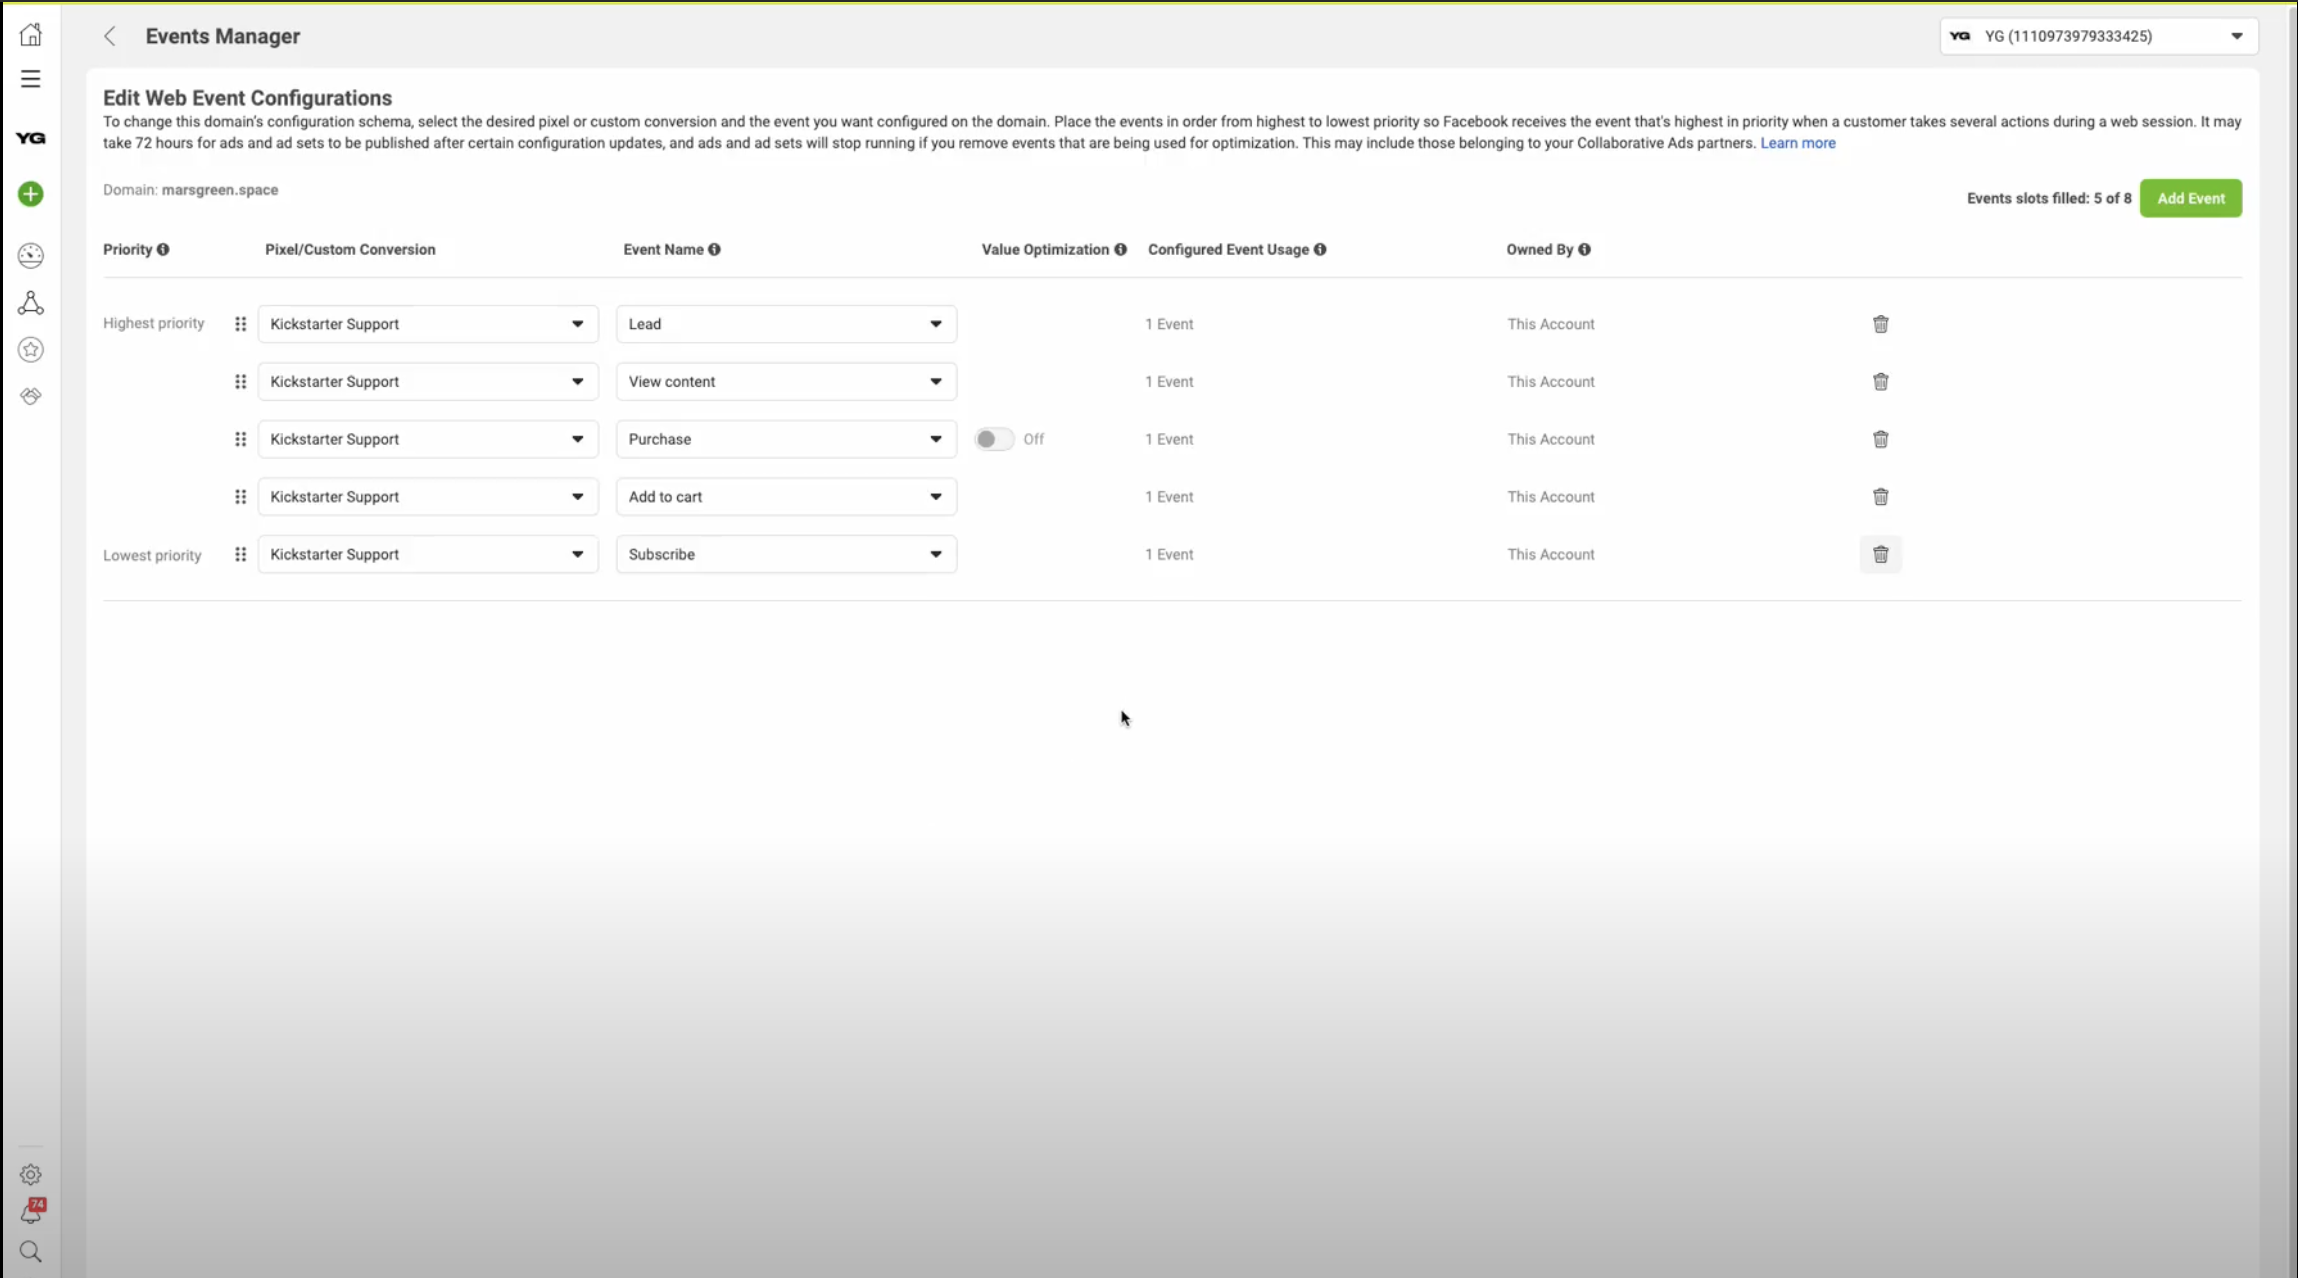
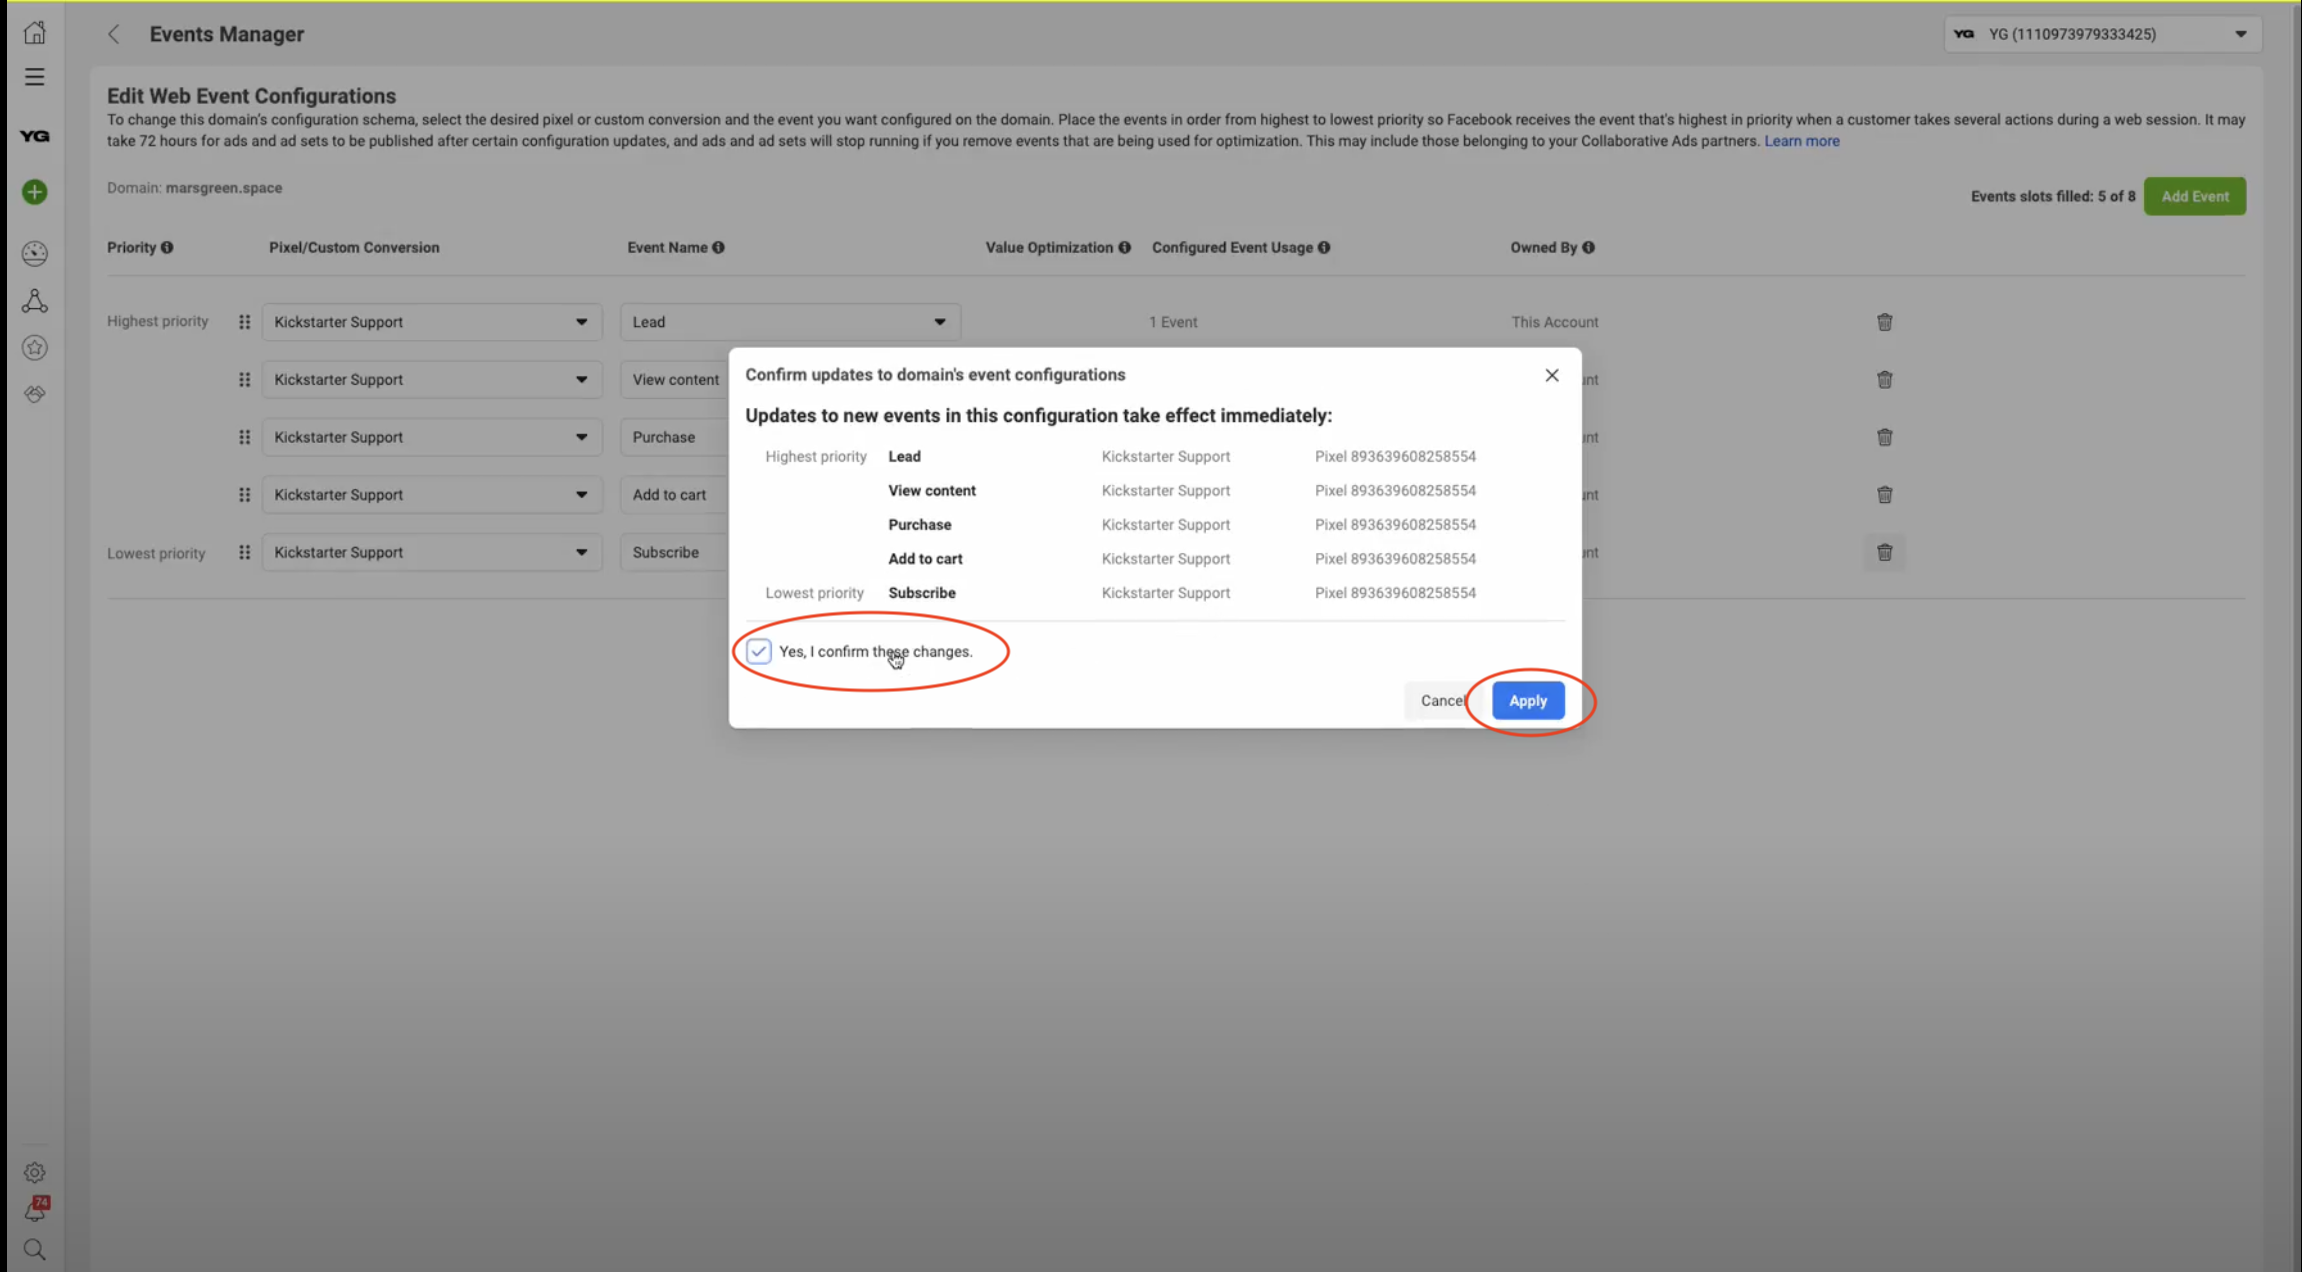
Choose these 5 events
Choose an event, in the end you need to have following events with always the same pixel:
Lead
View Content
Purchase
Add to cart
Subscribe
After you have the 5 events, click apply at the bottom right corner
Confirm & apply
Select Yes I confirm these changes and click Apply.
And you are all set. Now you just need to fill out your landing page with content and link your submission form to your Klaviyo account.